Creating a New Well
In this subsection, you will learn to create new wells.
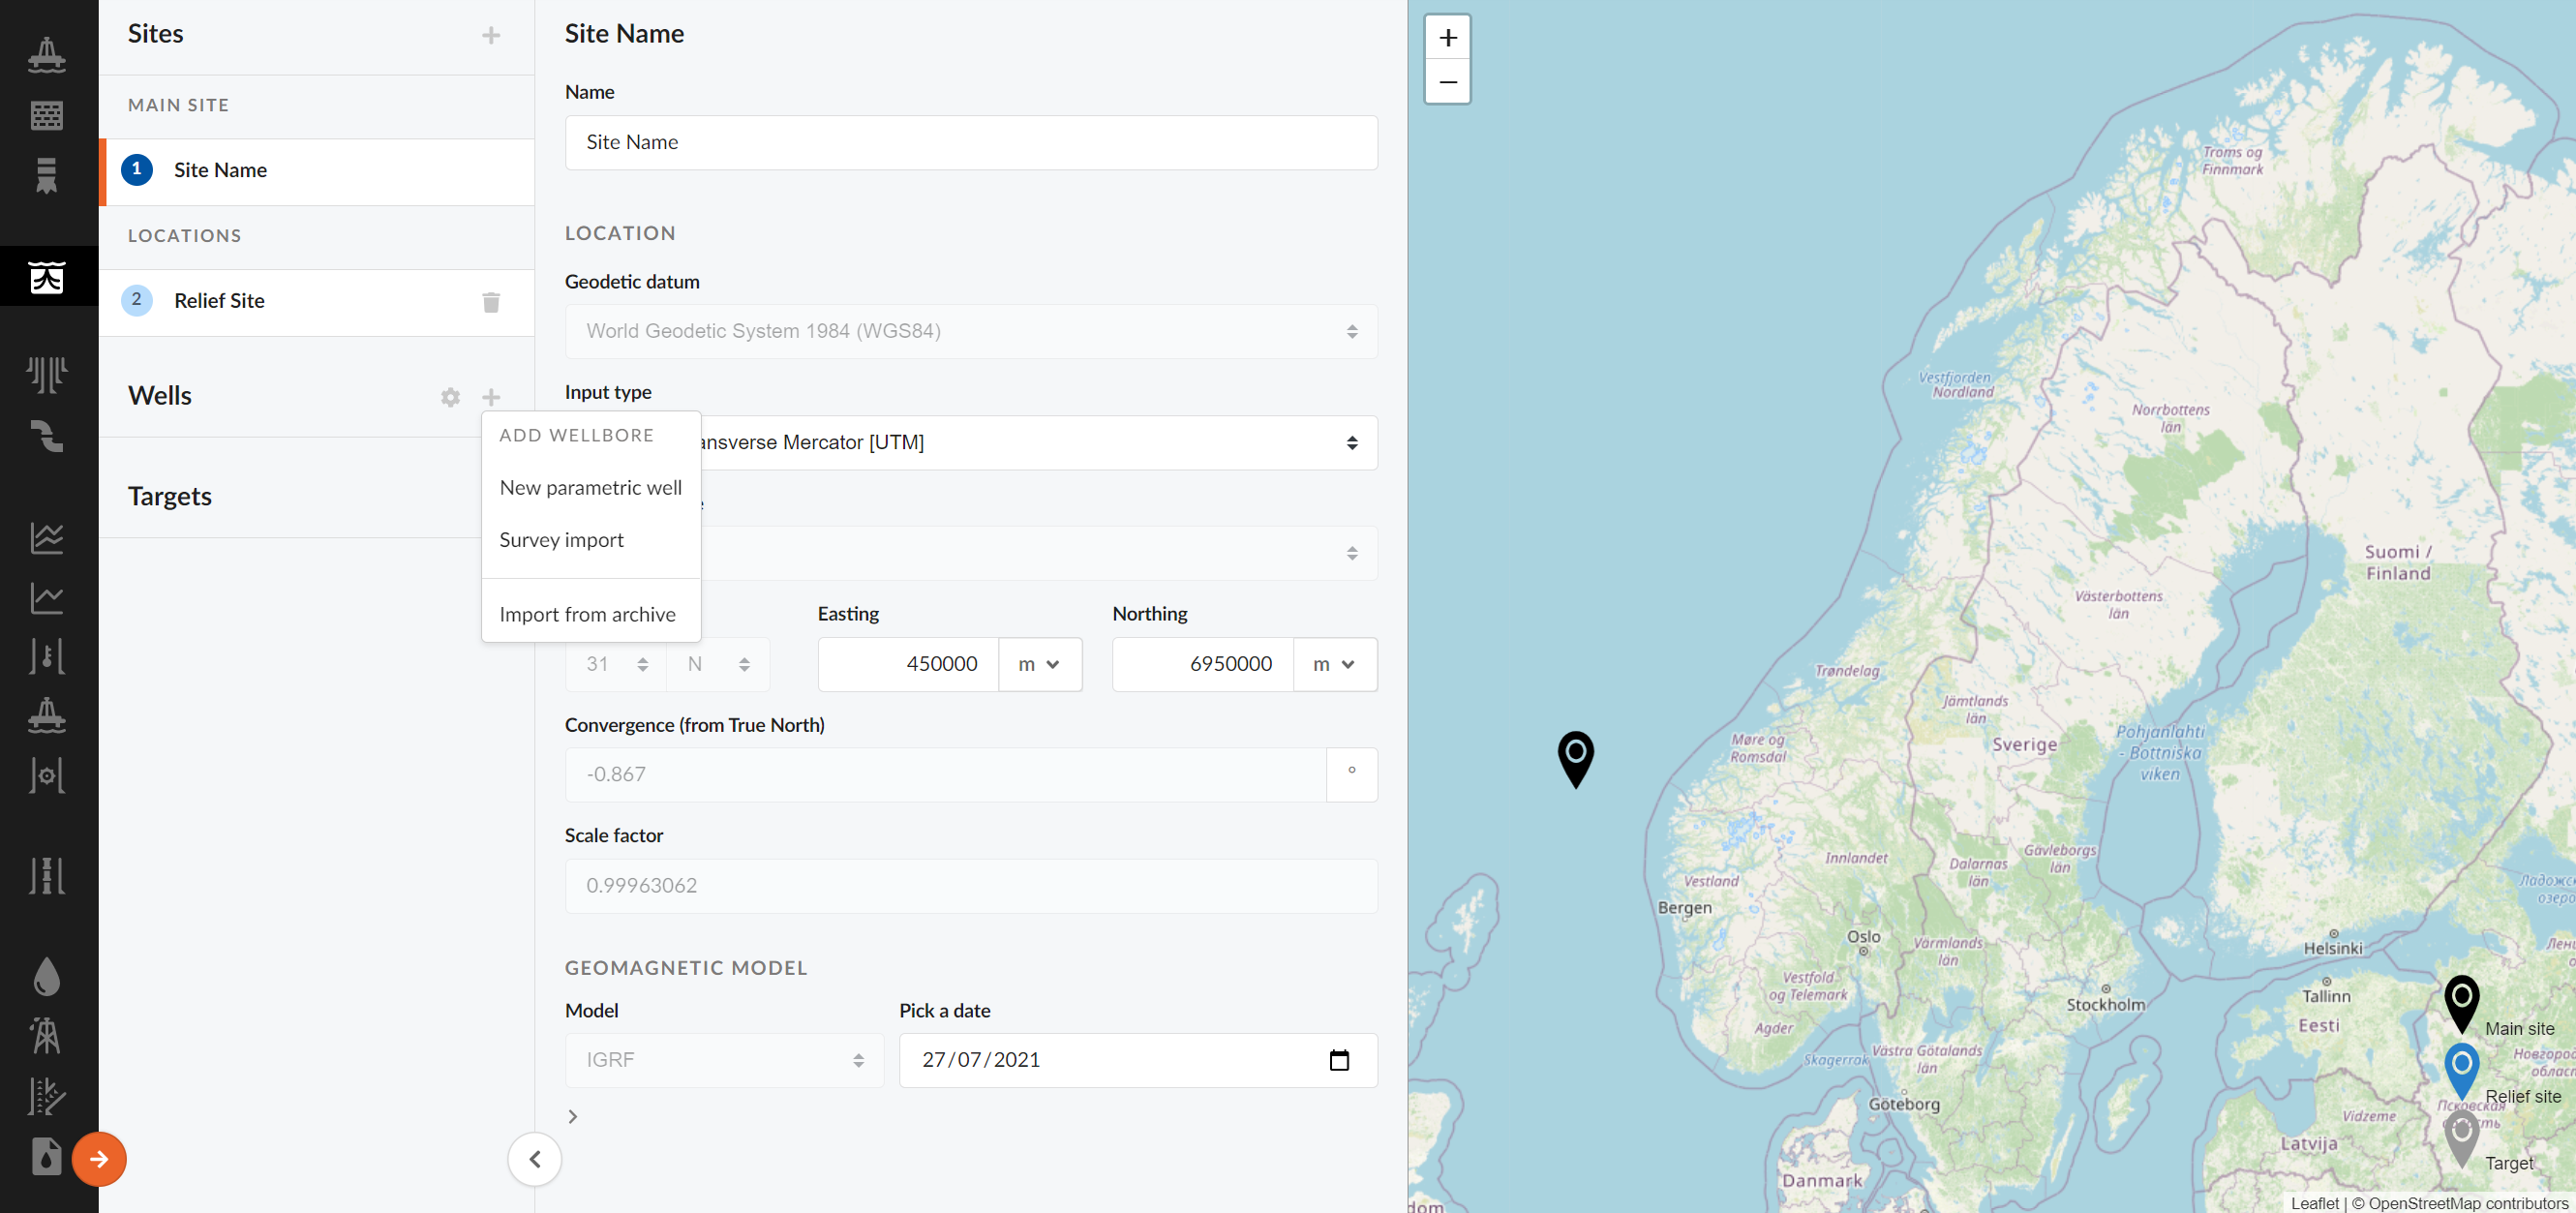
You are now ready to create new wells. All existing wells are listed to the left. You can easily add a new well by clicking on the "+" icon next to Wells.
| Button | Explanation |
|---|---|
| New Parametric Well | Lets you build a well parametrically. Here you can choose from different functions and construct your well, segment for segment |
| Survey Import | Creates a well based on a survey data sheet (XML etc.) or any other source by importing a survey listing with MD, inc, azi. The import process is the same as under formation data import. The help button provides information on import formats. |
| Import from Archive | Lets you import pre-made wells saved in the archive, based on project overview or map selection. |
Well Menus
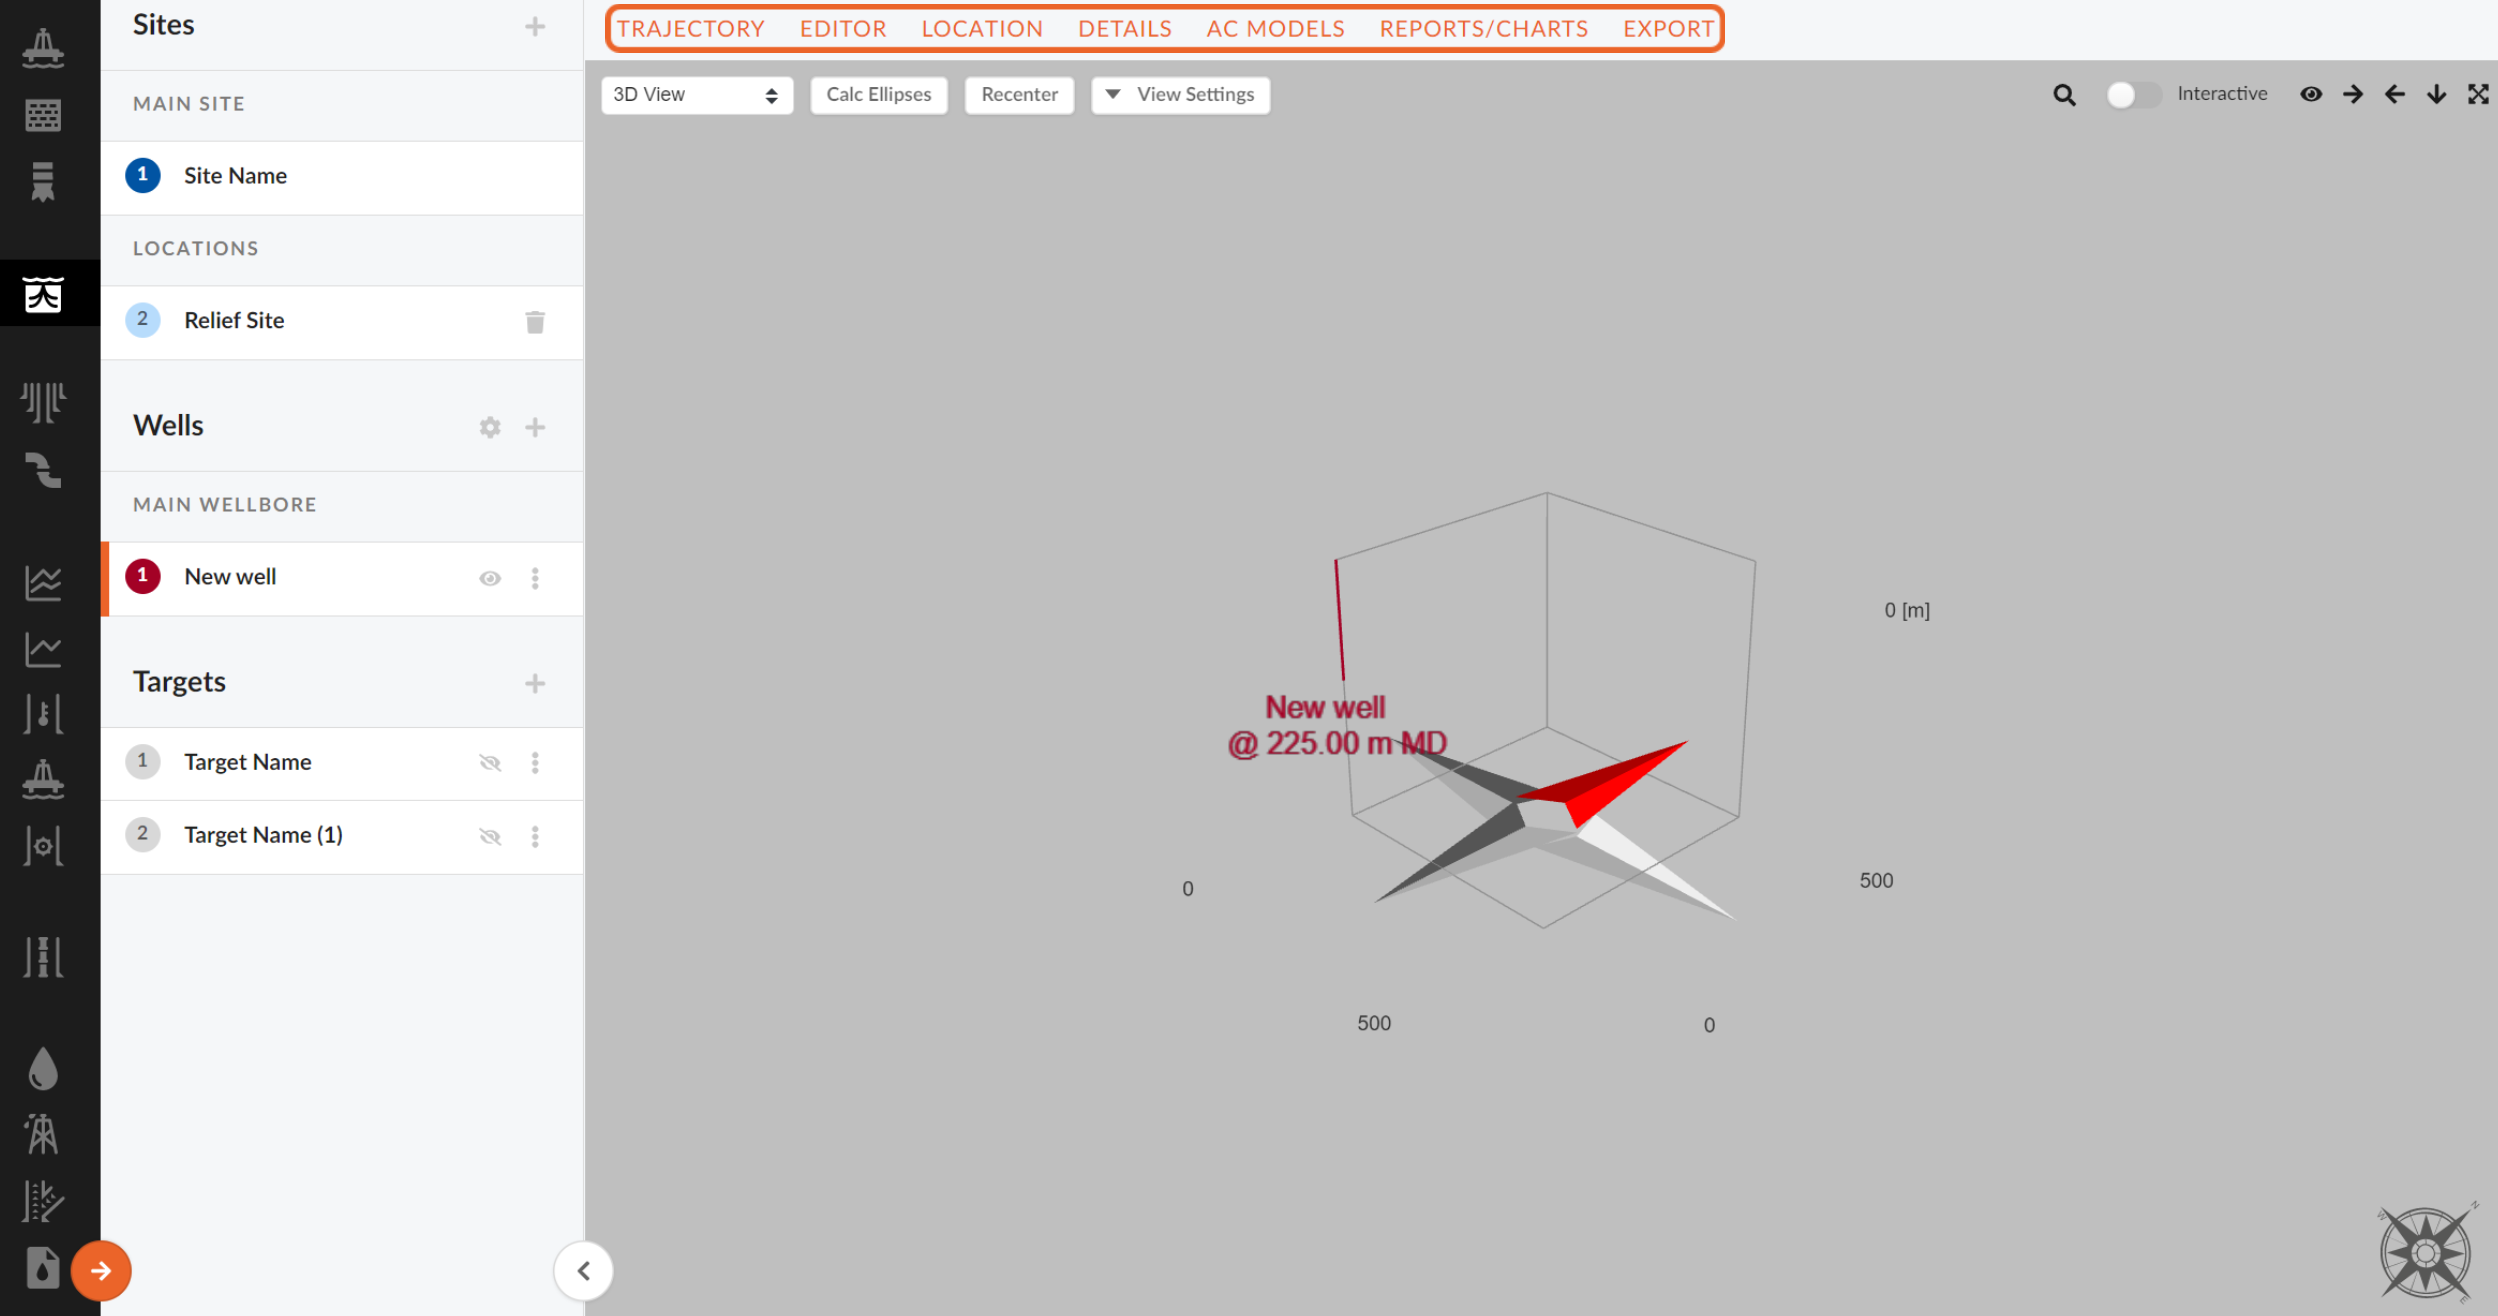
After creating your new well, the well will appear in a list (under Wells) with the name New Well or Imported Well. By clicking on a well in this list, the top menu bar will change and give you 7 optional tabs concerning the specific well you have selected.
NOTE!
Select Details to set the well name and specify other general properties
| Option | Explanation |
|---|---|
| Trajectory | Full screen graphical view of all or selected well. To see all wells, unselect a well. Wells can be hidden/visible by clicking the eye next to the well name in the list. This will hide the selected well. |
| Editor (Survey well) | Table for defining your well. Option for importing survey listing form external source. |
| Editor (Build/Parametric well) | Lets you build and design a well from scratch, segment for segment. You can choose a set of different functions/models to build a well segment. |
| Location | Allows you to specify the location of the well. |
| Details | Allows you to specify the name of the well, the hole size, and visual effects. |
| AC Models | Area for defining error models to you well for anti-collision calculations. |
| Reports/Charts | Area for error modeling and anti-collision reports. |
| Export | Area for export of well as a survey list. |
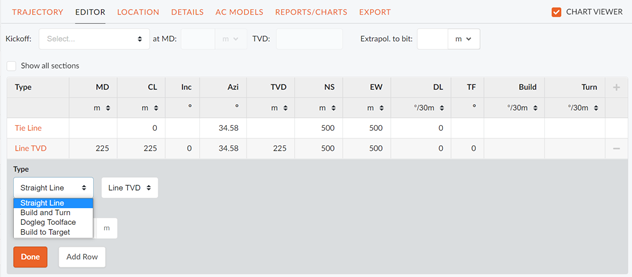
In the Editor, you may build and design a well from scratch, where each segment is represented by a row in the table. To insert a new segment, press the + sign in the upper right corner. Each segment is defined by its type field, and can take any value selected from the drop-down menu. In order for the segment to be valid and accepted, you must fill in all the fields. The Tie Line segment on the first row, is the standard default segment, and must be filled in. It is not possible to delete this segment.
NOTE!
- To delete a well section hold down CTRL and Shift and click the segment you want to delete.
- You can also move trajectory view by pulling the border line between section table and trajectory view. In order to see new changes in the trajectory view while planning click the update button in the top left corner in the 3D-view area.