Settings Menu
In this subsection, a further description of the options in the Settings Menu will be given.
Error Models
When entering the Error Models option in the Settings Menu, you can view, edit, add and delete the error models which are applicable in the Anti-Collision Module.
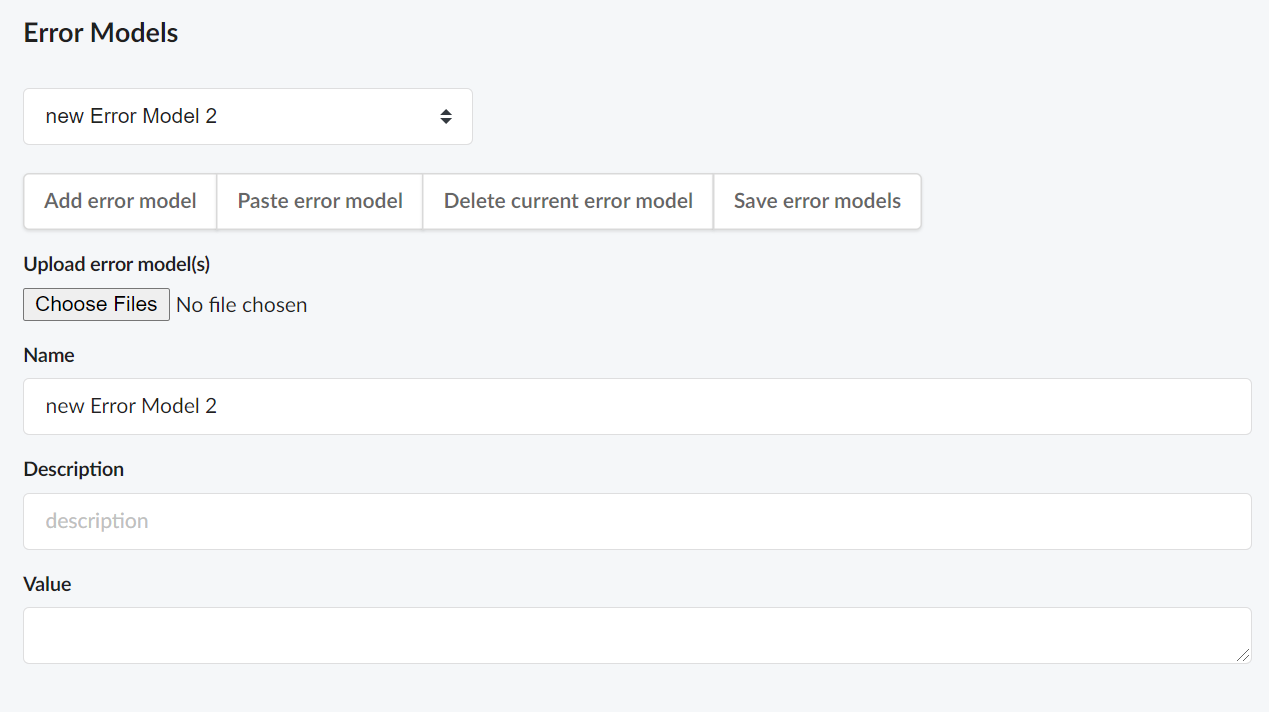
How to View an Error Model
All error models, available within your organization, can be viewed as a list by clicking on the drop-down menu for Error Models Selection. This menu is marked with a one in the figure above and will always display the currently-selected error model.
How to Edit an Error Model
To edit an error model, you must select it as your currently-selected error model. The model can then be easily edited by typing directly in the text boxes for name, description and value. It is also possible to upload an IPM-file or paste an error model by using the Paste Error Model button.
NOTE!
Remember to click on the Save Error Models button to avoid losing any inputted data after editing, adding or deleting error models.
How to Add an Error Model
A new error model can be added by using the Add Error Model button. A name, description and value should be given to the new model.

How to Upload an error Model
As mentioned, it is also possible to upload an IPM-file or paste an error model by using the Paste Error Model button. To upload an IPM-file, simply click on the Choose Files button and select an IPM-file to upload.

NOTE!
To upload several IPM-files, you have to create a ZIP file on your computer that contains all the individual IPM-files you want to upload. This ZIP-file must then be uploaded to the application.
How to Delete an Error Model
An error model can be deleted by using the Delete Current Error Model button. The button deletes the currently-selected error model.

Rule Set
When entering the Rule Sets option in the Settings Menu, you can view, edit, add and delete the rule sets which are to be applicable in the Automatic Design section of the Casing/Tubing Design Module.
The Rule Sets option directs you to a definition area for rule-based design. Here you can define your own set of rules and criteria to be used in the automatic design simulation, which automatically generates a string and casing design for your project.

How to View a Rule Set
The rule sets, within your organization, are displayed as a list to the left in the Rule Sets page. To view the parameters of a rule set, you have to select it by clicking the name. To edit the selected rule set, you simply alter the parameters directly in that page.
NOTE!
Remember to use the save button prior to navigating away from the page or a rule set to avoid loosing any inputted data.
How to Create a New Rule Set
A new rule set can be created by clicking the + button next to Rule Sets, marked with a one in the figure above. Once your new rule set has been given a name, you can begin to set certain criteria by using the General, Setting Depths, Load Cases and String Priority tabs.
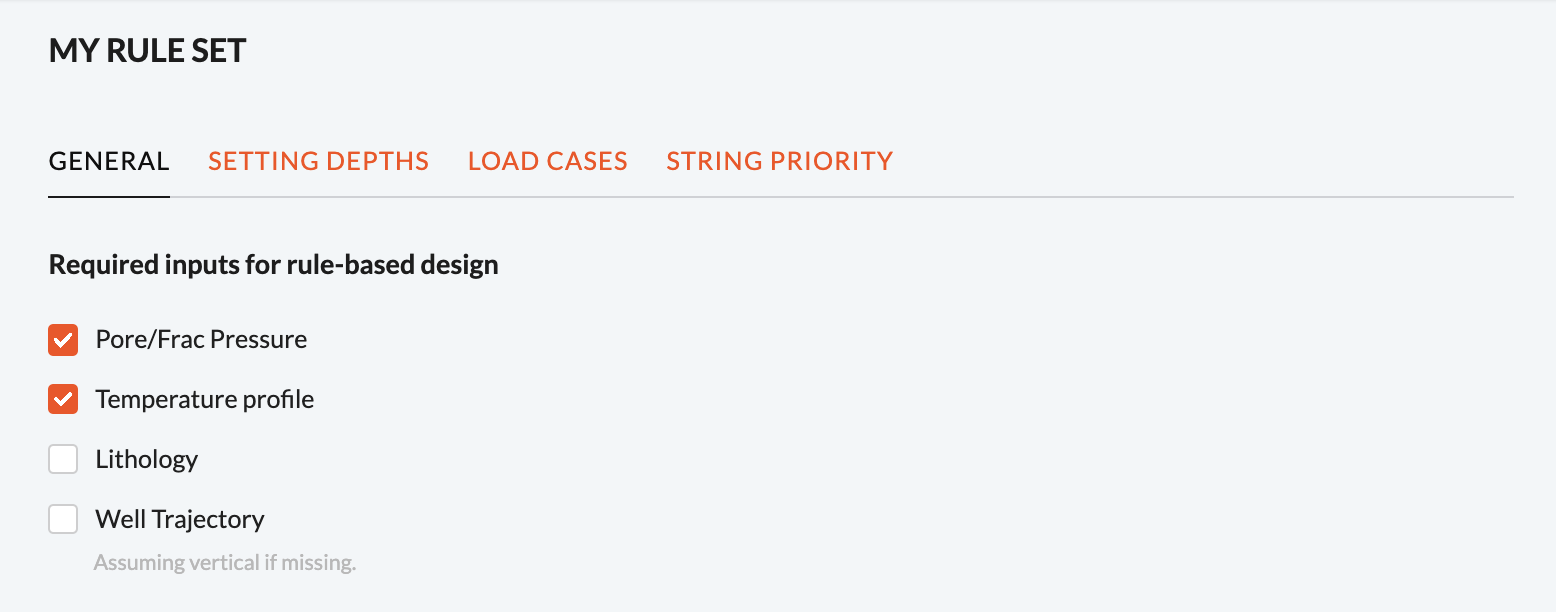
General
As seen in the figure, you can define the inputs required to perform an automatic design simulation in the General tab.
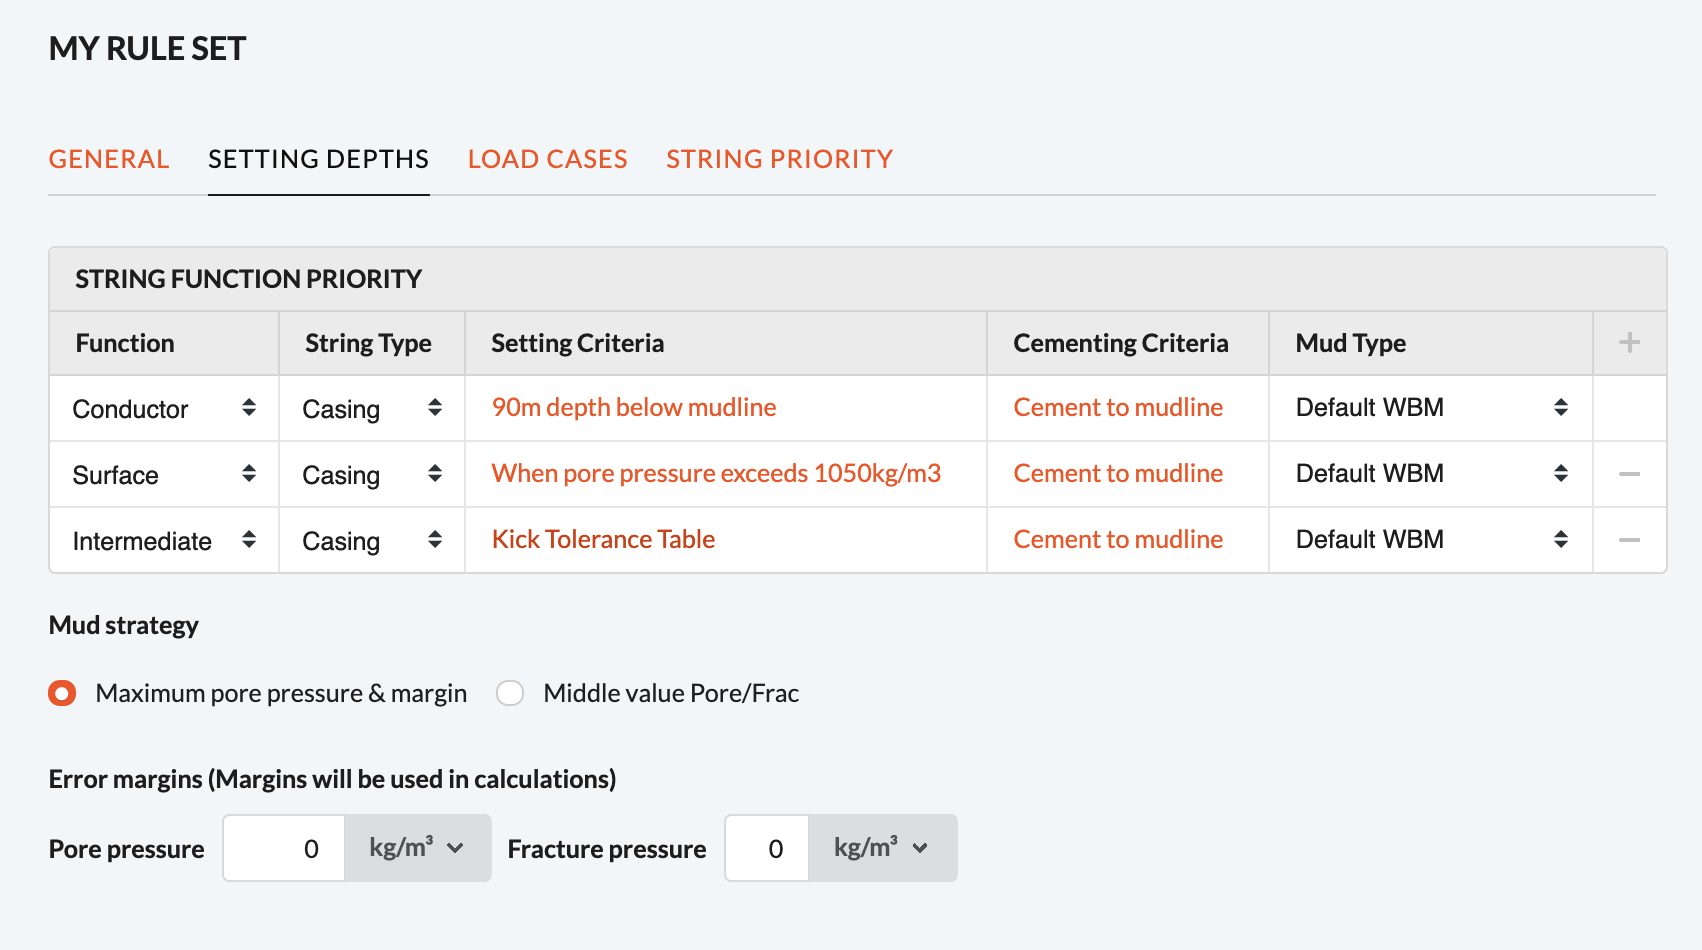
Setting Depth
In the Setting Depths tab, you can define the criteria which are to be prioritized when generating a drill string and casing design automatically. You can also set a mud strategy and error margins for the pore - and fracture pressure.
Load Cases
In the Load Cases tab, you can set the burst, collapse and installation load cases for the strings defined in the previous tab.

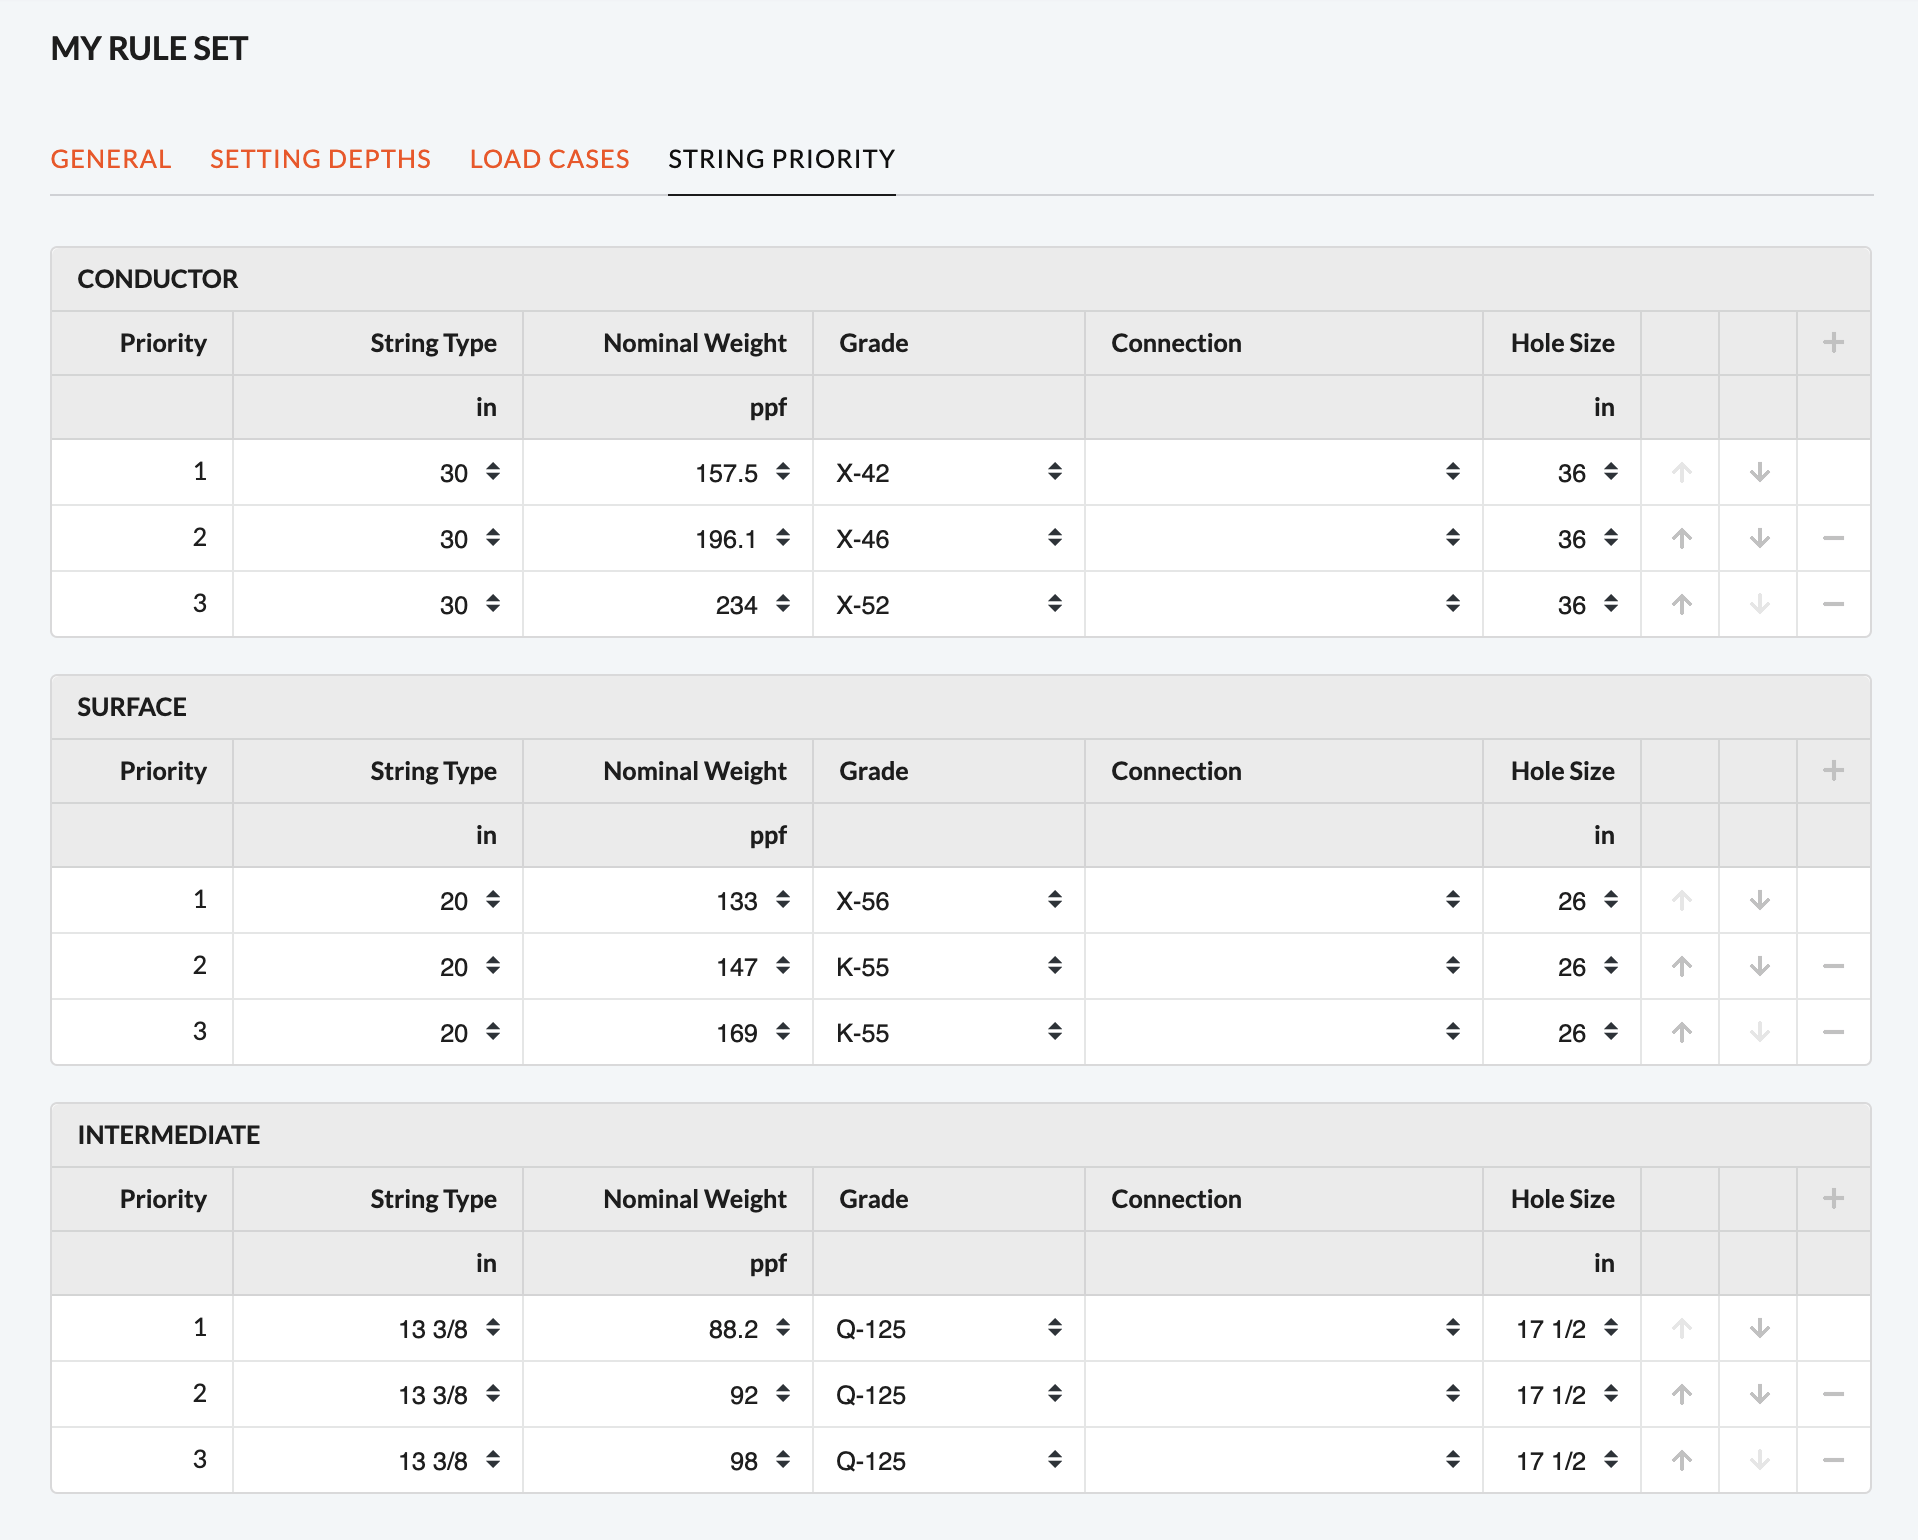
String Priority
In the String Priority tab, you define the nominal weight, grade, connection, string - and hole size which is to be prioritized for each of the strings defined in the Setting Depths tab.
How to Delete a Rule Set
By pressing the button marked with a two in the figure showing the Rule Sets page, the following menu will appear. As seen, you can delete, edit and duplicate a rule set.

NOTE!
You can rename your rule set by clicking the EDIT option
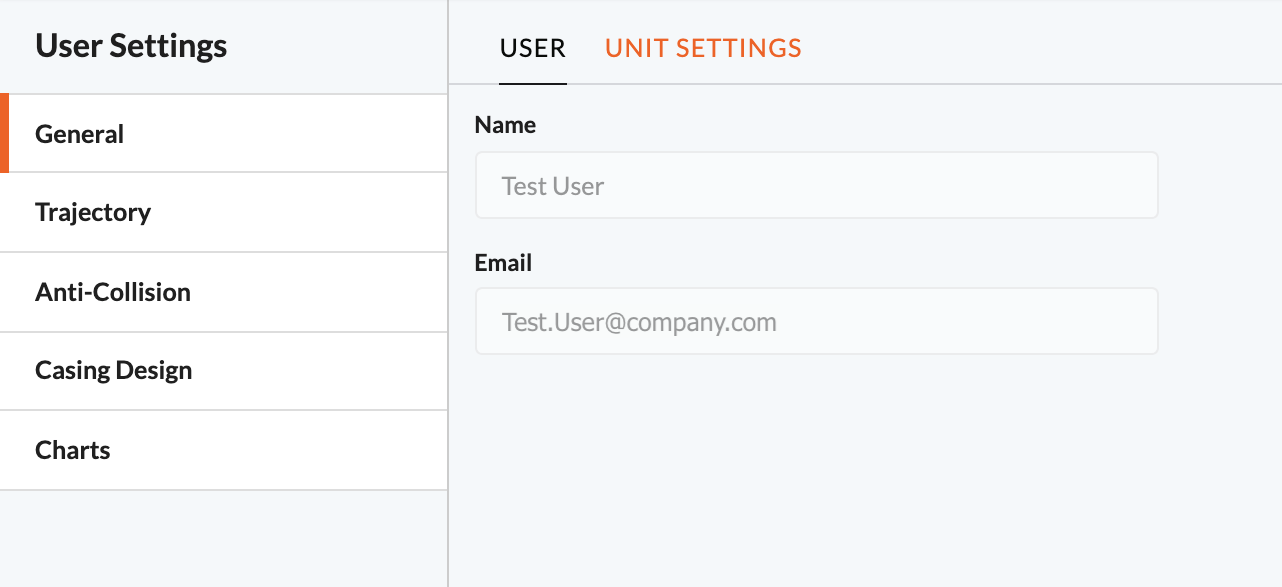
User Settings
In the User Settings option in the Settings Menu, you can edit some default parameters and units used in the application, as well as some appearance features.
When entering the User Settings option, you will see the following page with some user information. As seen in the figure, there are several user options, but only the Unit Settings tab will be elaborated further.
Unit Settings
In the Unit Settings tab, you can select the unit template that is to be applied when working with a project in the application. There are three unit templates to choose between; API, NCS or Custom by User. The latter lets you define your own unit template by allowing you to select the desired unit for each of the parameters applicable in the software.
NOTE!
Selecting a new unit template in the User Settings will not affect existing projects, i.e. the selected unit template will only be applied in projects created after making the change.