Libraries
In this subsection, you will learn about Oliasoft WellDesign™'s Libraries and how to navigate in it.
Libraries is found to the right of the Projects tab and as the name implies, it is a library containing most of the elements available when designing a well in Oliasoft WellDesign.
When entering the Libraries tab, marked with a one in the figure below, you will see the following page
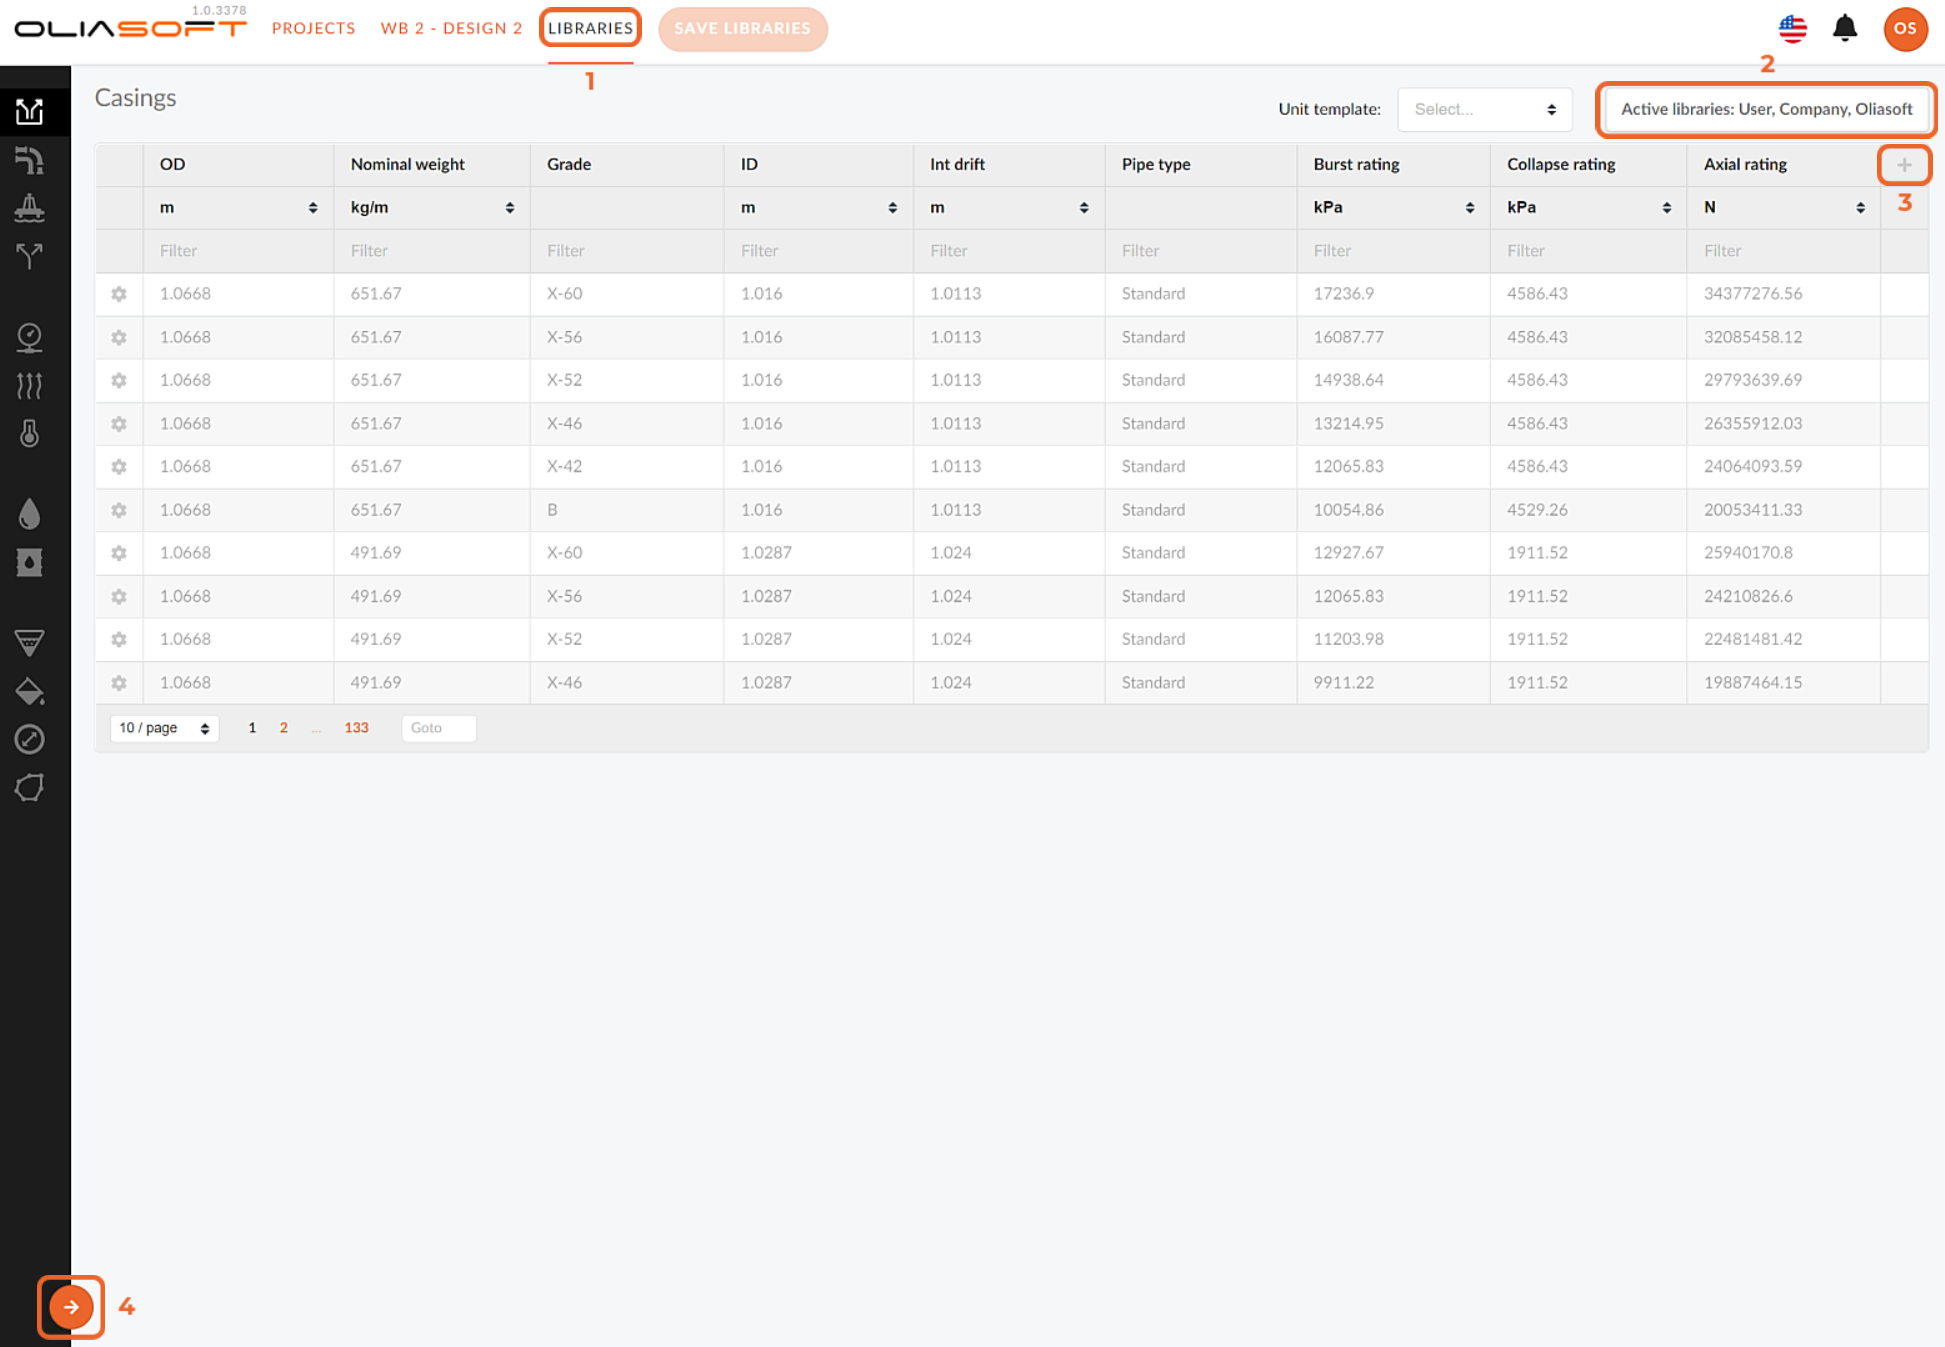
There are three main components to be aware of when navigating in the Libraries of Oliasoft WellDesign. These are described briefly in the following list, using numbers corresponding to the figure above:
- Active Libraries Button
Is used to edit which libraries are to be applicable across the application.
Add Button
Is used to add elements to the selected library.
Libraries Menu Button
Is used to expand the Libraries Menu, which displays a list of all the libraries found in Oliasoft WellDesign. Libraries.
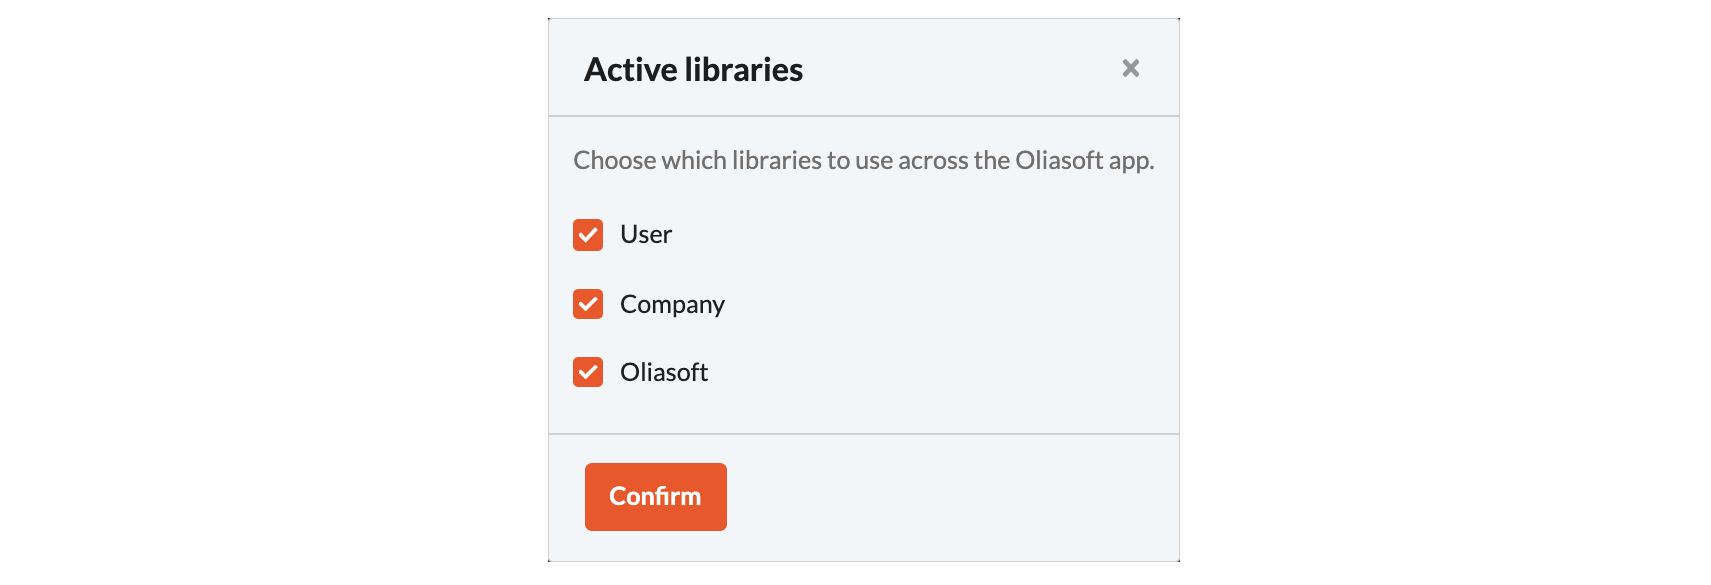
Active Libraries
Oliasoft WellDesign's Libraries is divided into three groups dependent on whether the elements are available only for your user account, the entire company or all users of the software. The latter group contains the default standard elements provided by Oliasoft.
| Group | Description |
|---|---|
| User | Elements saved to this group is only visible to you. |
| Company | Elements saved to this group is visible to all users in your organization. |
| Oliasoft | Standard elements visible to all users of Oliasoft WellDesign. |
NOTE!
Elements saved to the User group can only be viewed by you and thus, it is not possible to share the parts of your project containing such elements with others.
By clicking on the Active Libraries button, the following modal window appears. It is a sorting mechanism allowing you to choose which groups of Libraries you would like to have available when designing a well in Oliasoft WellDesign.
Libraries Menu
The Libraries Menu button expands a menu displaying all libraries to be found in Libraries. These libraries are made up of all the elements available in the application, depending on the Active Libraries settings. For example, all drilling fluids applicable in Oliasoft WellDesign are displayed in the Drilling Fluids library.

How to Add Elements to Libraries
In each library of Libraries, elements can be added using the Add button. As seen in the first figure, this button is displayed as a + sign in the upper right corner of the table in each library.
When clicking the Add button, a modal window will appear giving you the option to save the new element to the User or Company group. In addition, the modal window contains several input fields specific to the selected library. When you have filled in all input fields, the new element can be added to the table of the selected library by clicking the Create button.
NOTE!
In each library, the elements are listed in the following order, depending on the Active Libraries settings
- User elements
- Company elements
- Oliasoft elements
Example: Adding an Element to the Casing & Tubing Section
Click on the Libraries Menu button to open the menu displaying all libraries to be found in Libraries.
Find the Casing & Tubing library and select it by clicking on it.
Click on the Add button, found in the upper right corner of the table, to add new casing element. The following modal window will then appear.
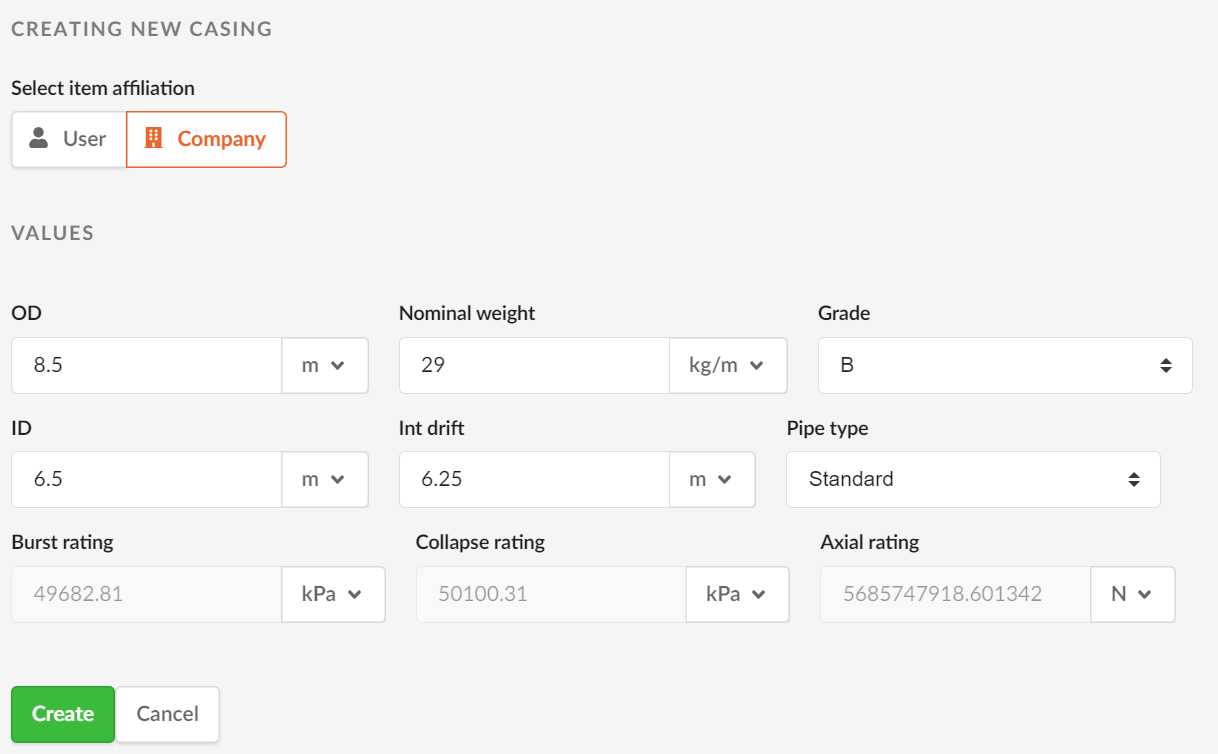
- When all required input fields have been filled in, you can click on the Create button to save the new casing element to the Casing & Tubing library. The element will now be applicable when defining a casing design in Oliasoft WellDesign.
How to Edit Elements in Libraries
To edit an element in a library, you simply click somewhere in the area marked with a one in the figure below. When doing so, the modal seen in the figure will appear. Here you can edit the values directly in the input fields and the changes will be saved when clicking on the Save Changes button.
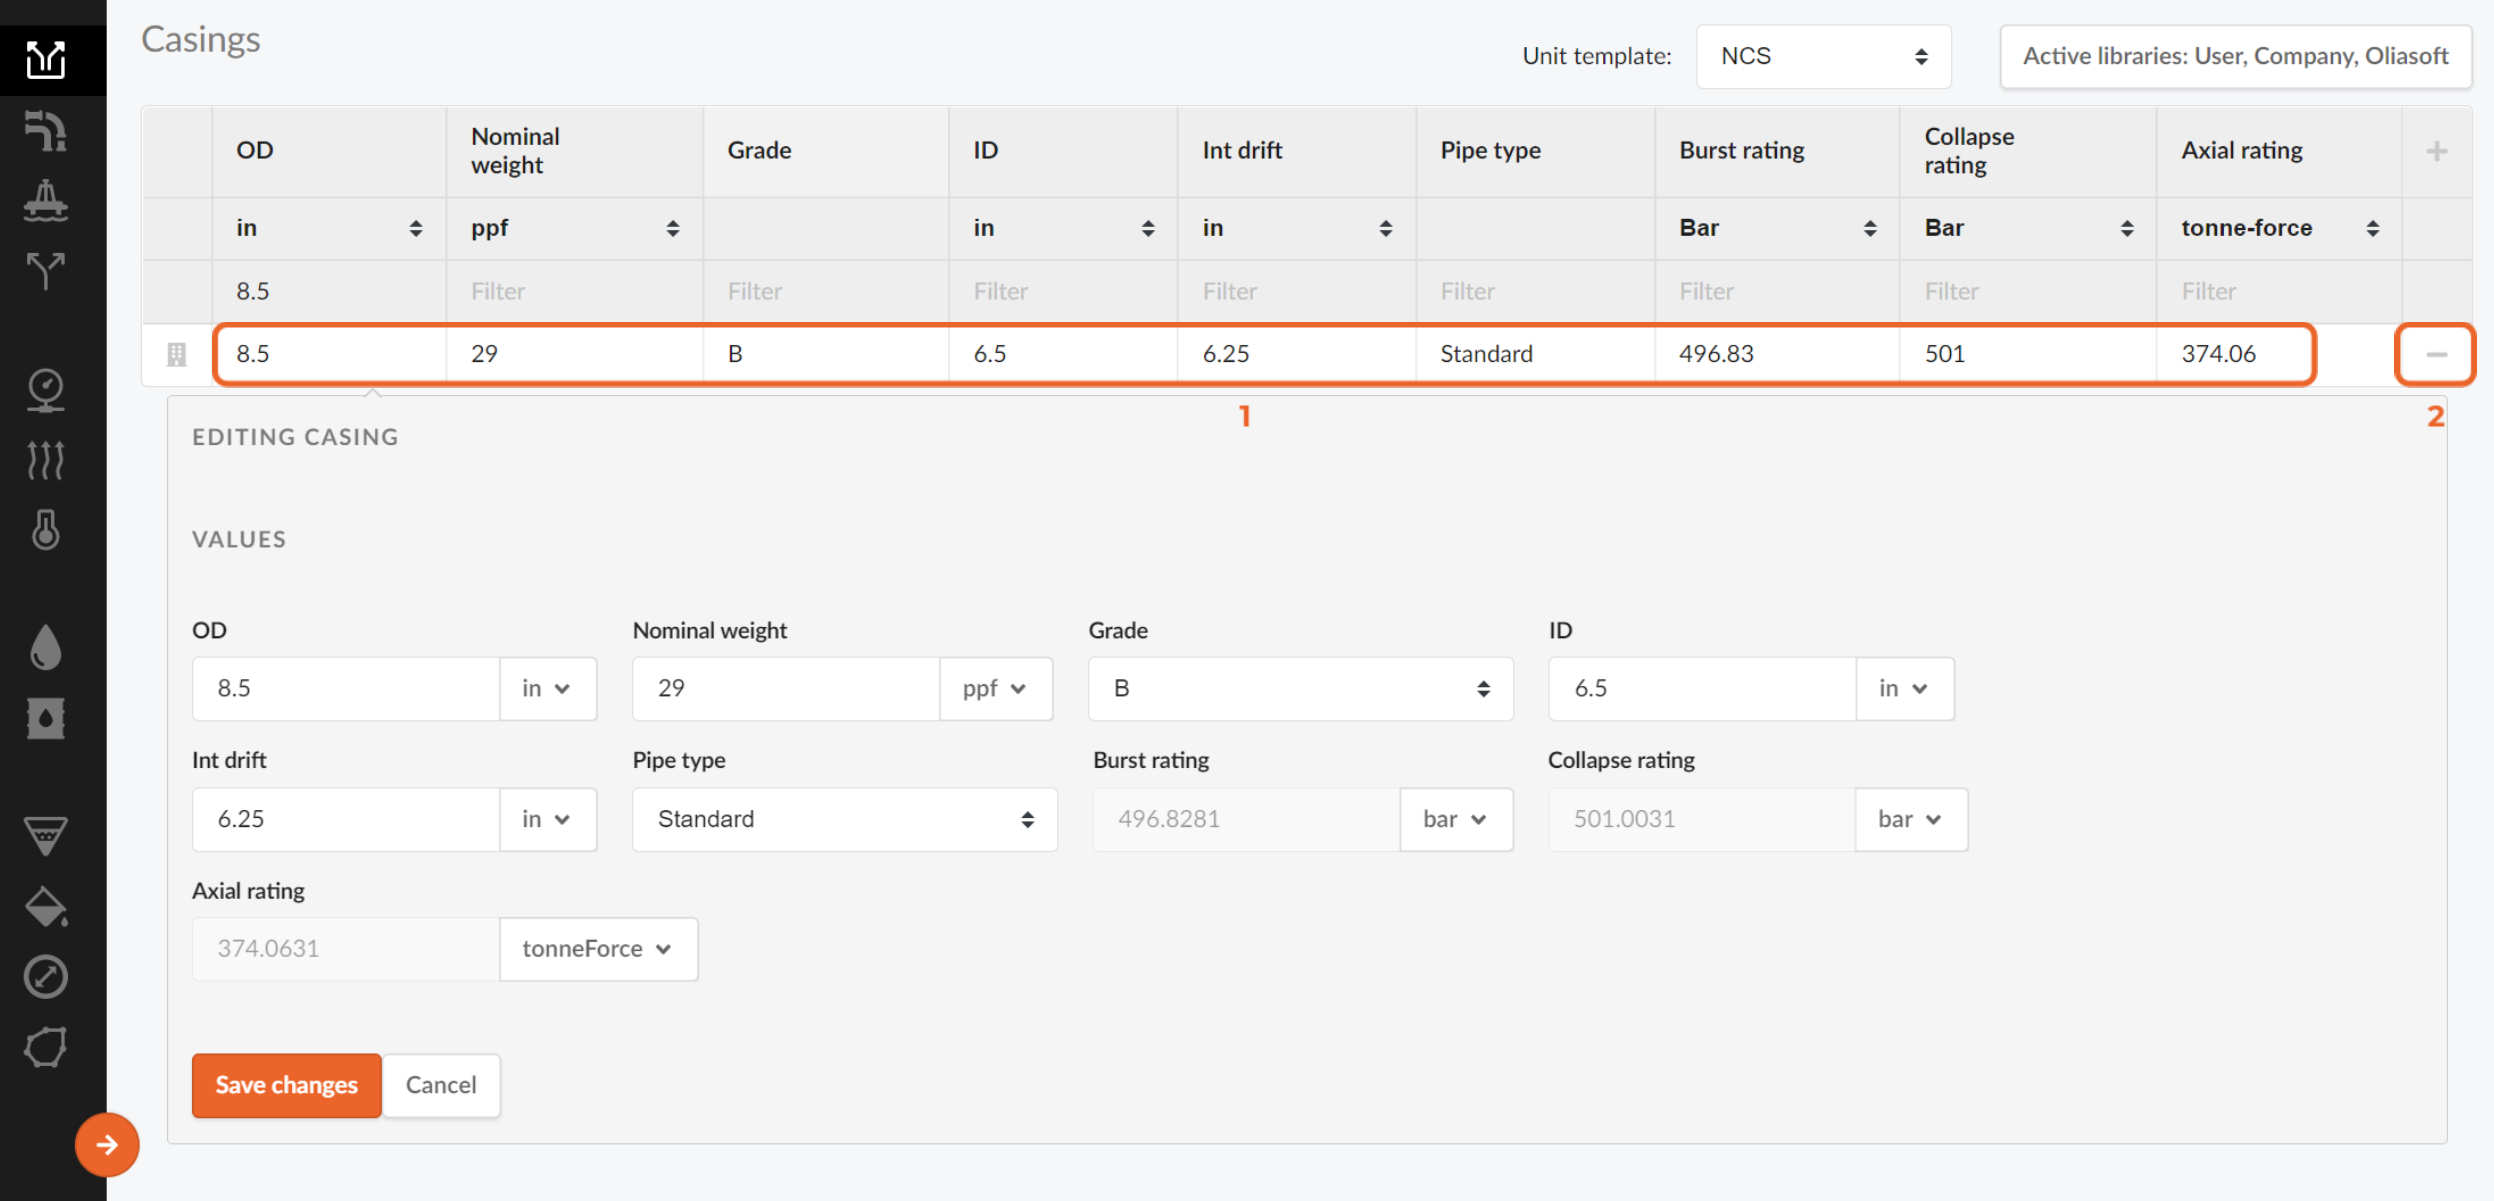
How to Delete Elements from Libraries
To delete an element from a library, you have to click on the - button marked with a two in the figure above. When doing so, the following modal window will appear and you can press the Delete button to delete the selected element.

NOTE!
The Oliasoft group contains standard elements provided by Oliasoft and thus, it is not possible to save or delete elements from this group