Drill Strings / BHA
In this section, you will learn how to create drill strings and BHAs.
The String/BHA section page contains a list on the left hand side which displays a summary of all the drill strings and casing strings added to the dataset. When no drill strings or casings have been added, you will only be able to see the following header:

As seen, it contains three buttons which have the following functions:
Add button
Is used to add a new drill string to the dataset.
More Button
Is used to import a pre-made BHA from Libraries.
Show Less Button
Is used to hide/show the list of strings.
How to Create a New Drill String
A new drill string can be created in two ways, either manually or by importing a pre-made BHA from Libraries.
How to Create a New Drill String Manually
A new drill string can be added manually by clicking the Add button, which is marked with a one in the first figure. When doing so, you will get the possibility to give your drill string a name and by clicking the Ok button, the following page with an empty table will be displayed. Once defined, this table will contain all components of the drill string.
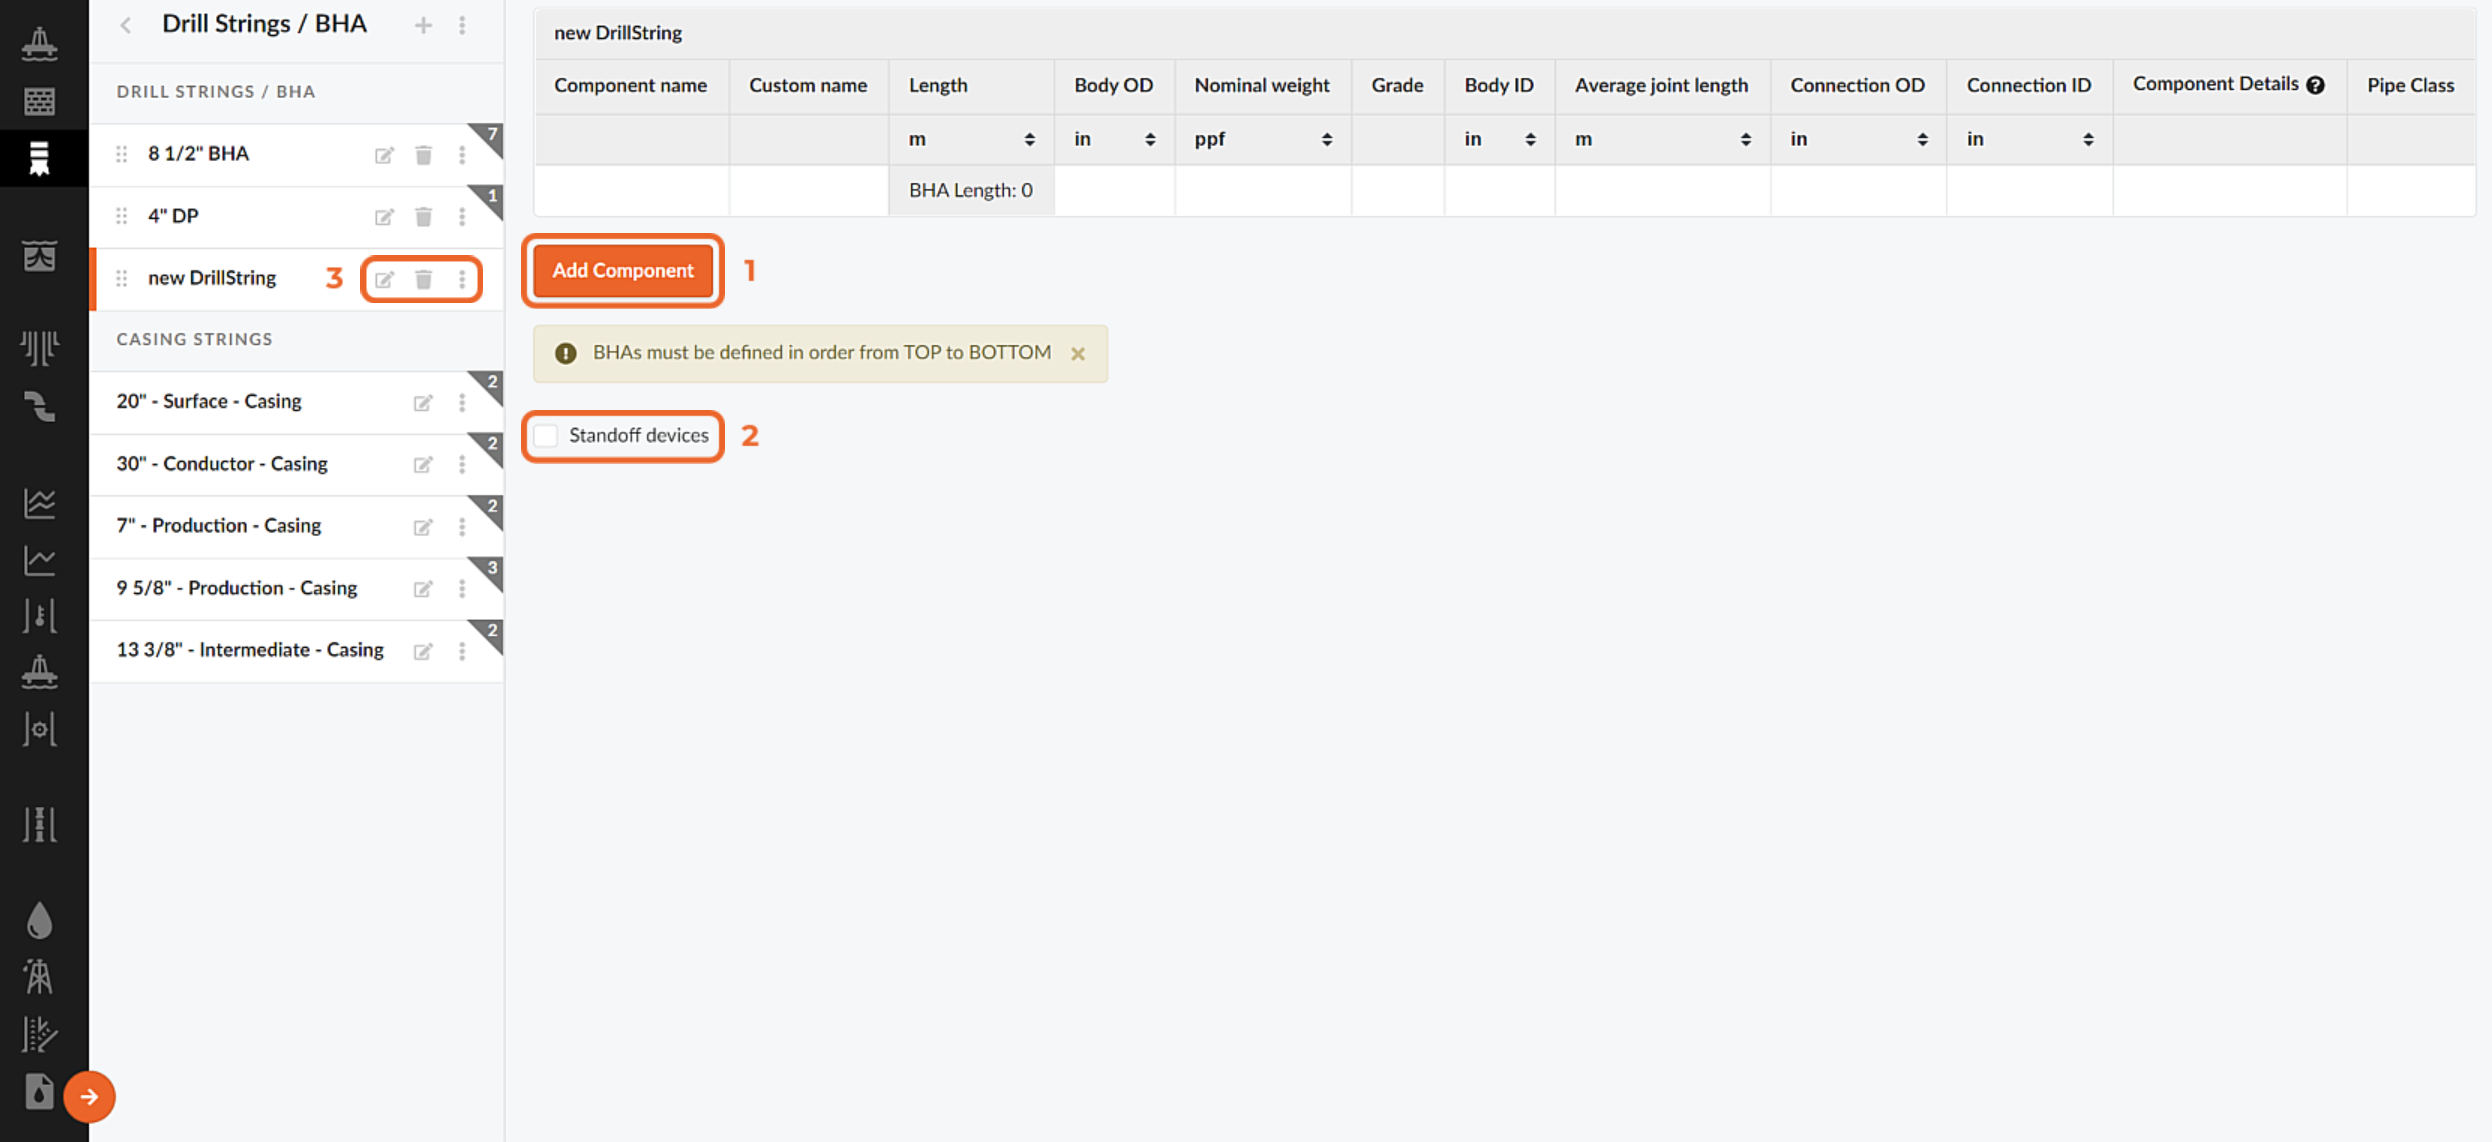
The following sections describes the areas marked with the numbers 1-3 in the figure above:
1. Add Component Button
Is used to add components to the drill string.
A modal will appear when clicking this button and it allows you to add a drill string component in two ways, either by importing a component from Libraries or by creating a custom component. These are further described below.
NOTE!
The drill string an BHA components must be defined in the order from TOP to BOTOM in Oliasoft WellDesign™.
Import From Library
The following figure shows the modal that appears when clicking the Add Component button and selecting Import From Library as the edit mode.
In this edit mode, you can find components that are available in Libraries and add them to your drill string. Components are easily found using the drop-down list or by typing directly in the Filter cells, which are marked with a one in the figure below. When you have found the component you are looking for, you simply click on it and it will be added to the drill string.

NOTE!
In the drill string components table, the length of the first component cannot be altered as it is meant to represent a variable length of drill pipe, whose length is adjusted to fit the sections and operations applied in the Oliasoft WellDesign simulations.
NOTE!
If the number of stands is not defined, the blowout rates will be the same at all flow locations.
Custom (Other)
The following figure shows the modal that appears when clicking the Add Component button and selecting Custom (Other) as the edit mode.
In this edit mode, you can define a custom component that is to be added to the drill string. The following input fields must be defined for the new component, while the rest of the inputs are optional.
- Component Name
- Body OD
- Nominal Weight
- Grade
- Body ID
- Average Joint Length (set to 9m as default)
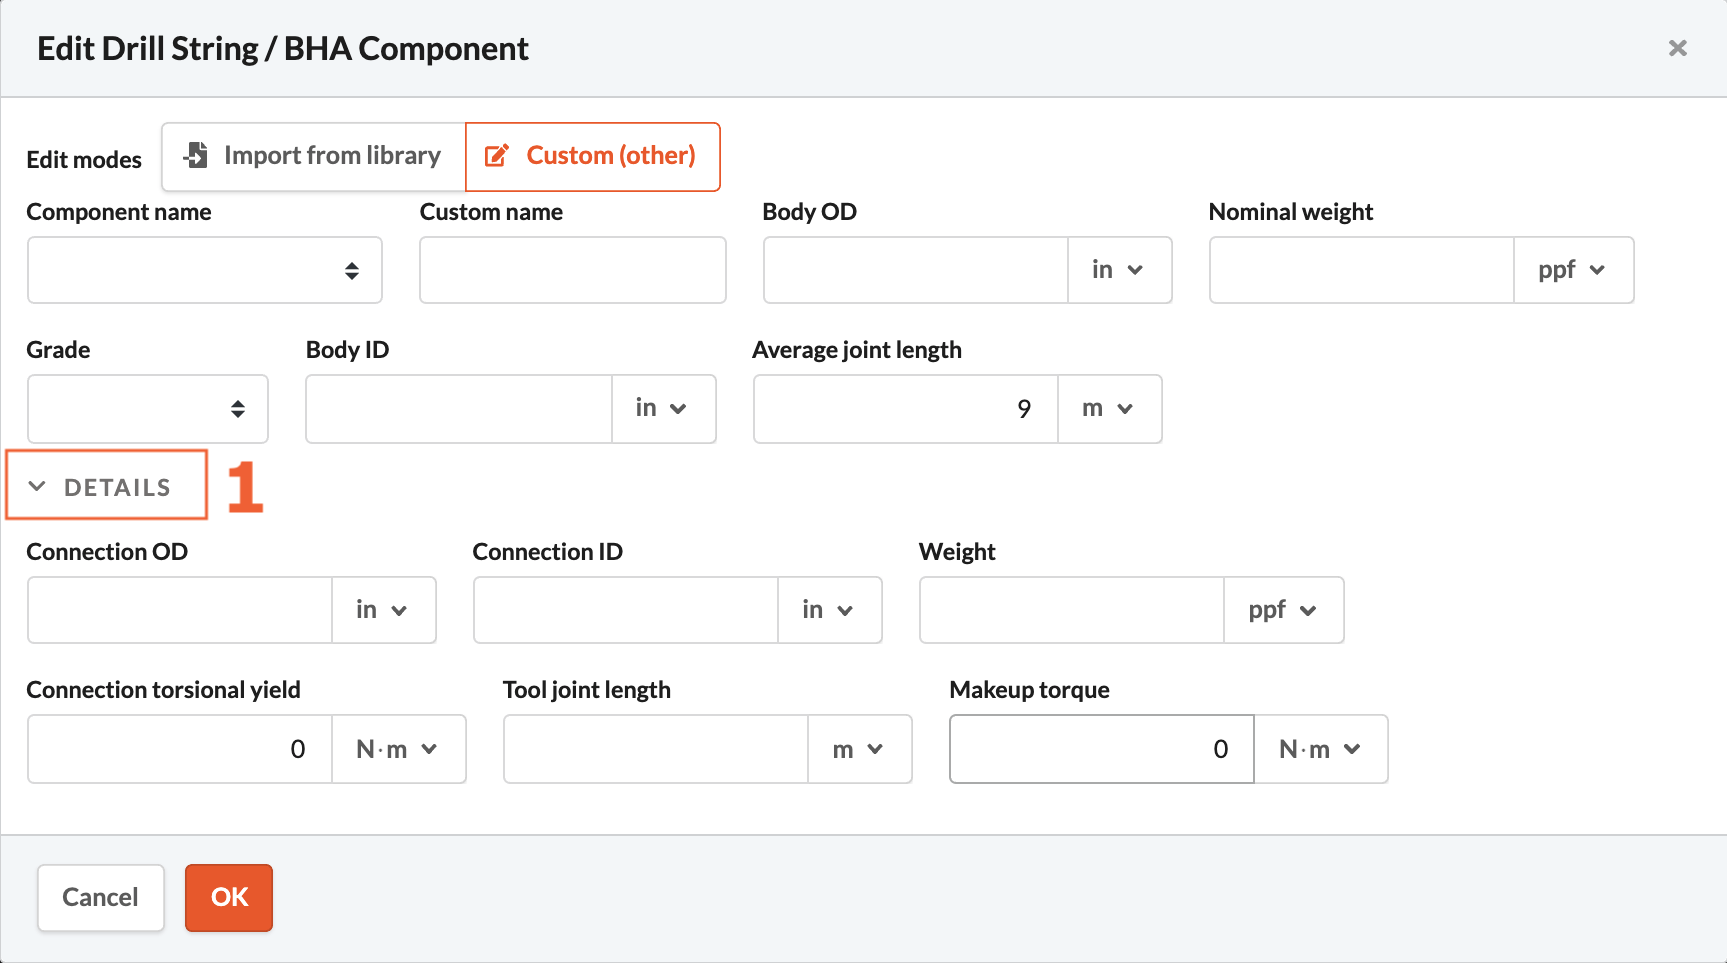
NOTE!
Most of the optional input fields are hidden until you click on the text that says Details, marked with a one in the figure.
NOTE!
If you are planning to use a custom component several times, you can add it as a new element to the Drill Pipe & BHA Components library in Libraries. Once that is done, you will be able to find it in the Import From Library edit mode.
NOTE!
In the drill string components table, the length of the first component cannot be altered as it is meant to represent a variable length of drill pipe, whose length is adjusted to fit the sections and operations applied in the Oliasoft WellDesign simulations.
NOTE!
If the number of stands is not defined, the blowout rates will be the same at all flow locations.
2. Toggle On/Off Standoff Devices
By toggling on standoff devices, a new table will be displayed where you can define certain standoff devices that are to be added to the drill string. When adding a new device to the table, you can either choose to add a rigid standoff or a bowstring centralizer. These options are described in the following sections.
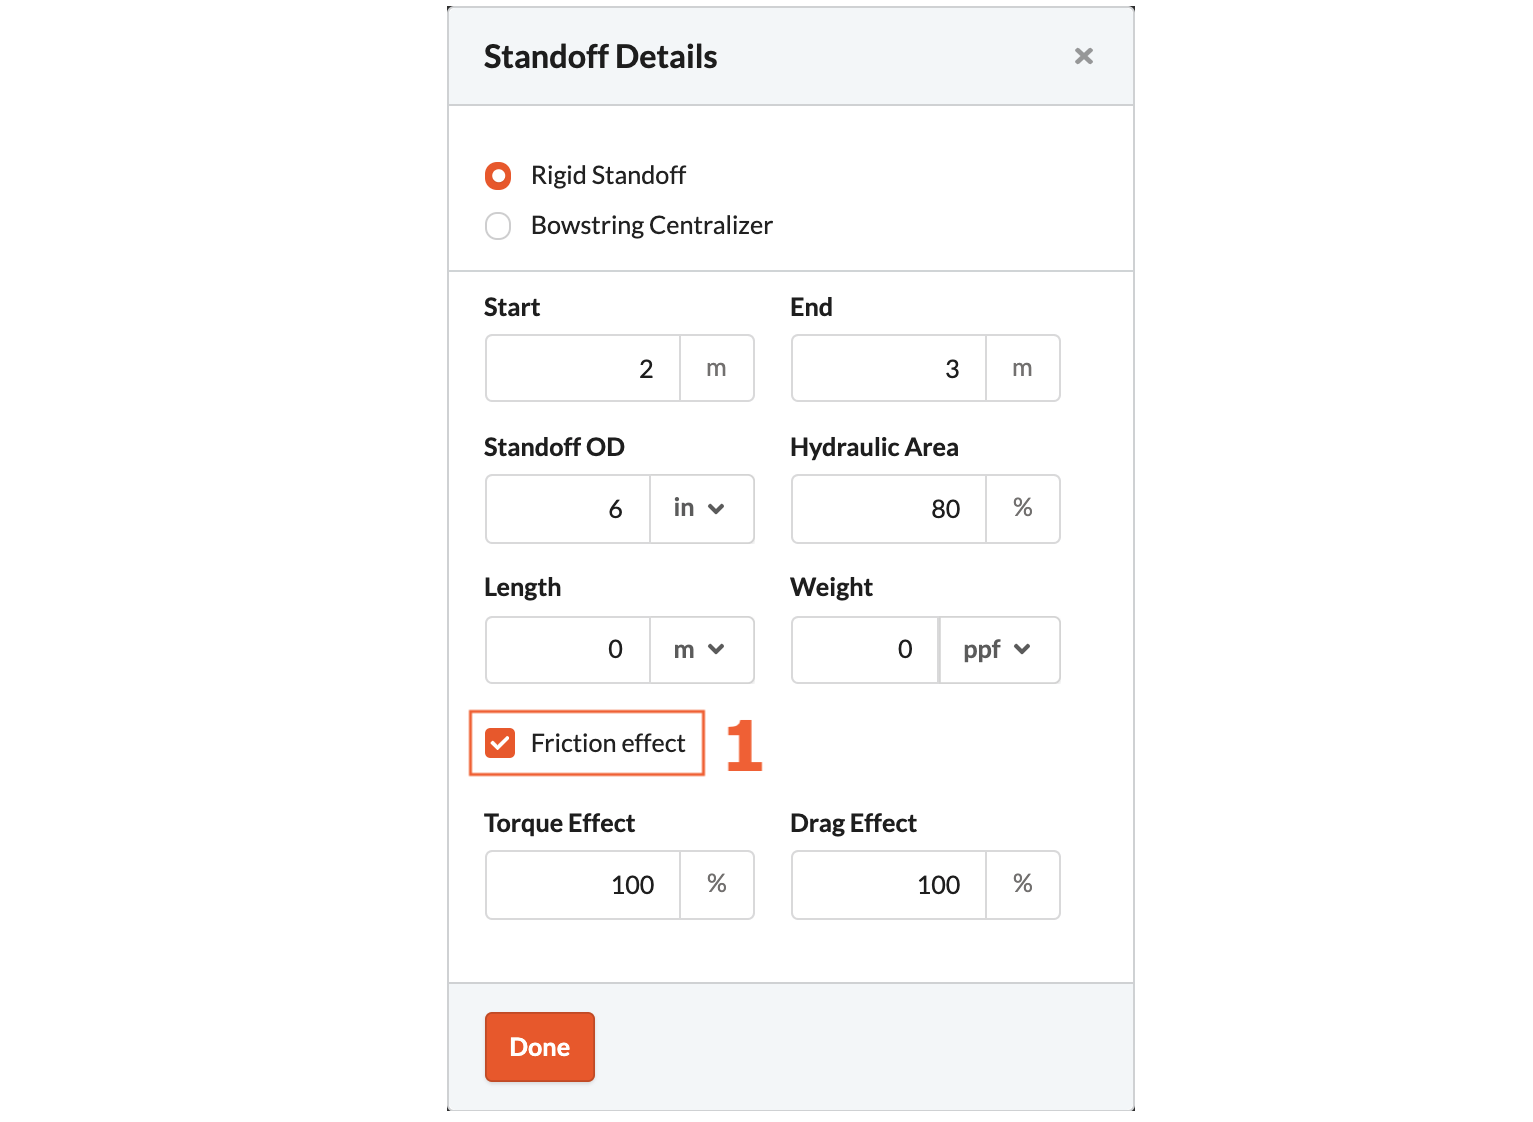
Rigid Standoff
When clicking the Add Device button, you will see the following modal where you can choose to add either a rigid standoff or a bowstring centralizer. By selecting the first option, the modal will display the input fields seen in the figure below. It is also possible to define friction effects by clicking on the box marked with a one.
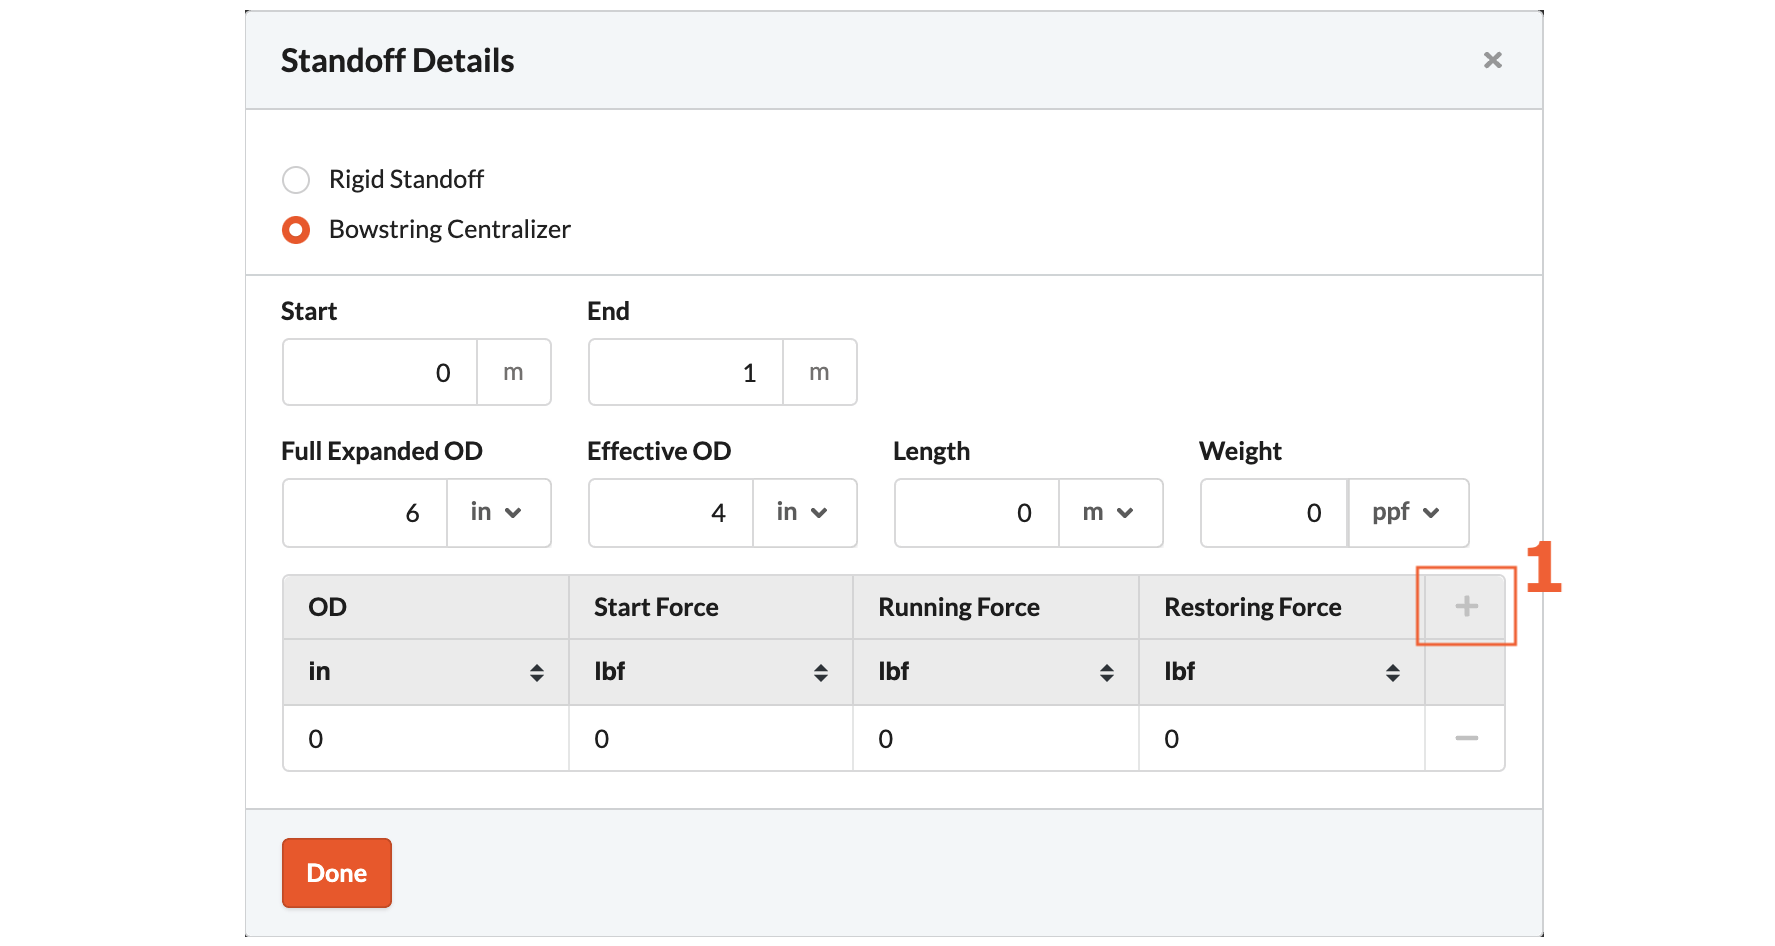
Bowstring Centralizer
By selecting the bowstring centralizer option, the standoff details modal will display the following input fields. As seen, it is possible to define a start-, running- and restoring force for several outer diameters of the bowstring centralizer by adding new rows to the table. This is done by clicking the Add button, which is marked with a one in the figure.
3. Drill String Options
This area contains three buttons, where the first two allow you to edit and delete the drill string, respectively. The latter gives you the options to rename and clone the drill string.

How to Import a BHA from Libraries
A pre-made BHA can be imported from Libraries by clicking the more button, which is marked with a two in the first figure. When doing so, the following modal will appear showing a list of the BHA designs available in Libraries.
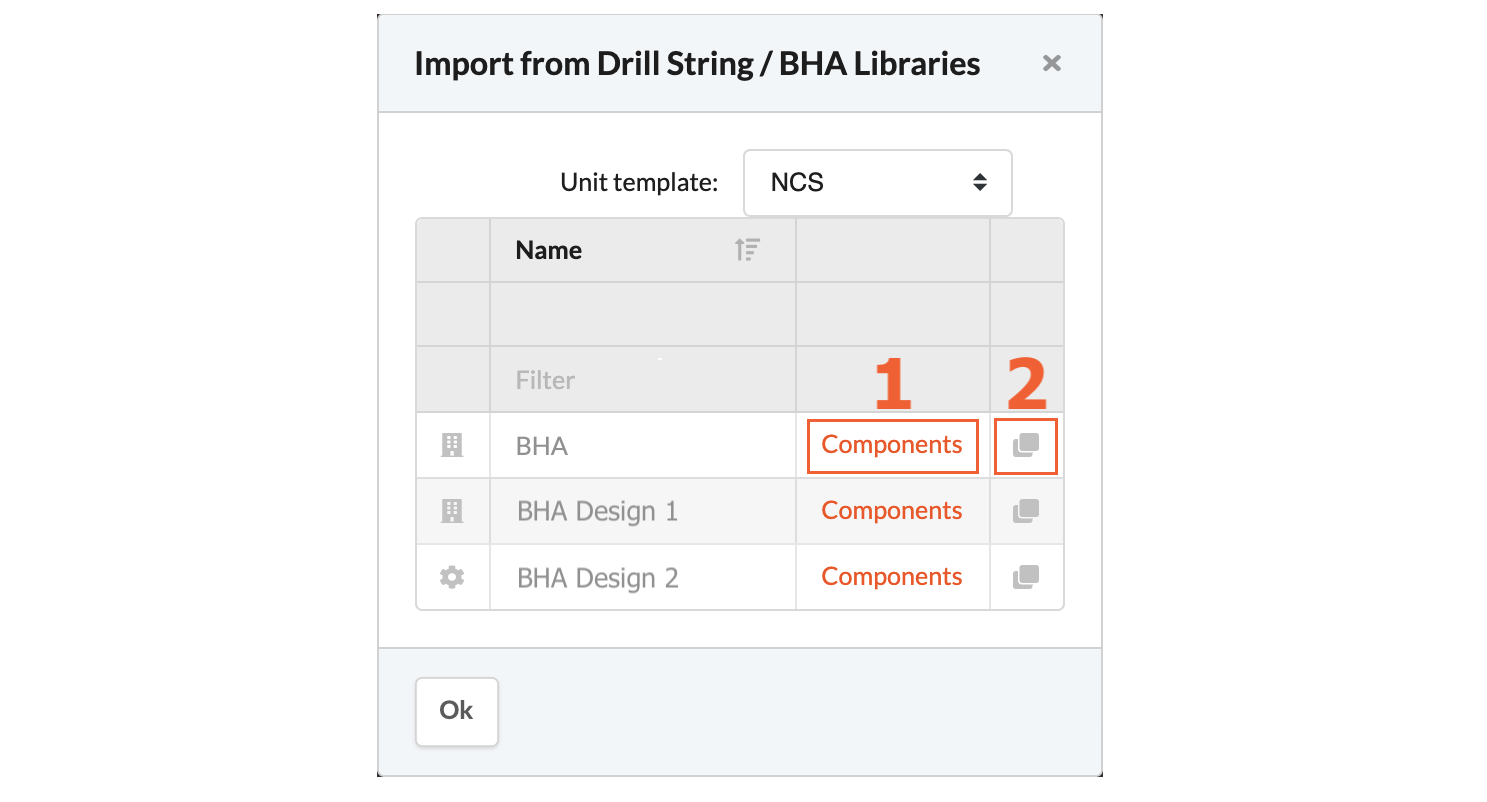
As seen in the figure above, the modal contains two buttons which have the following functions:
Components Button
Takes you to the BHA library, where you can view what components the drill string design contains.
Paste Button
Is used to select and import the pre-made BHA design from Libraries.
How to Edit a Drill String/BHA Component
Once you have defined the drill string/BHA components for your drill string, they will be displayed in the table shown in the following figure.

The following list describes the areas marked with the numbers 1-3 in the figure above:
Component Name
As seen, the name of the component is highlighted in orange. By clicking on a components name, a modal will appear where you can edit the selected drill string/BHA component.
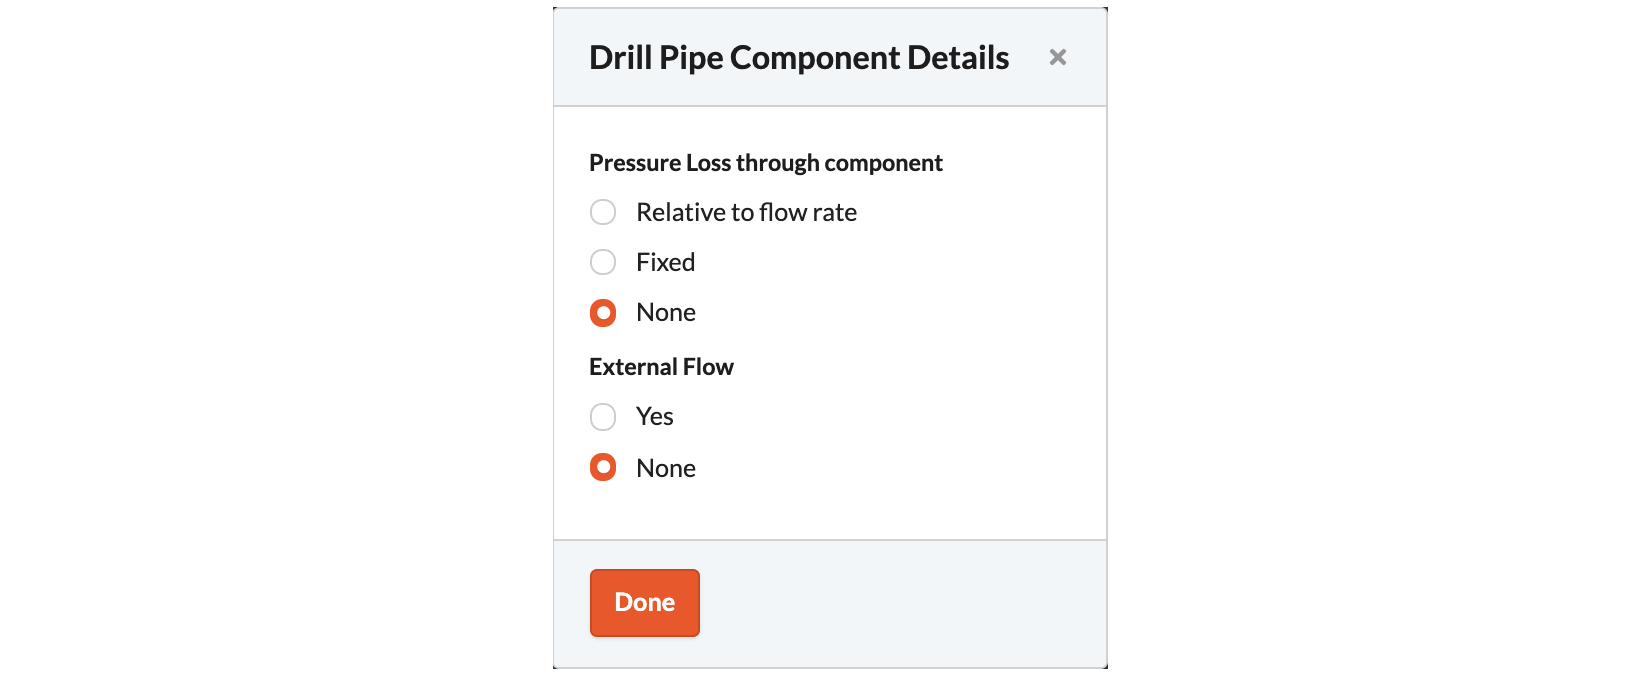
Component Details
The following modal with some component details will appear when clicking on this text highlighted with orange.
Component Options
This area contains three buttons, where the first one allows you to move the selected component either up or down in the table. The second button deletes the component, while the third duplicates it.
